

Part I — Build the OCI network and VM
1. Open Virtual Cloud Networks
From the OCI Home page, enter Networking → Virtual Cloud Networks. The image below is the original Picture 1 from the field-deployment Word guide; it is used without conversion or downscaling.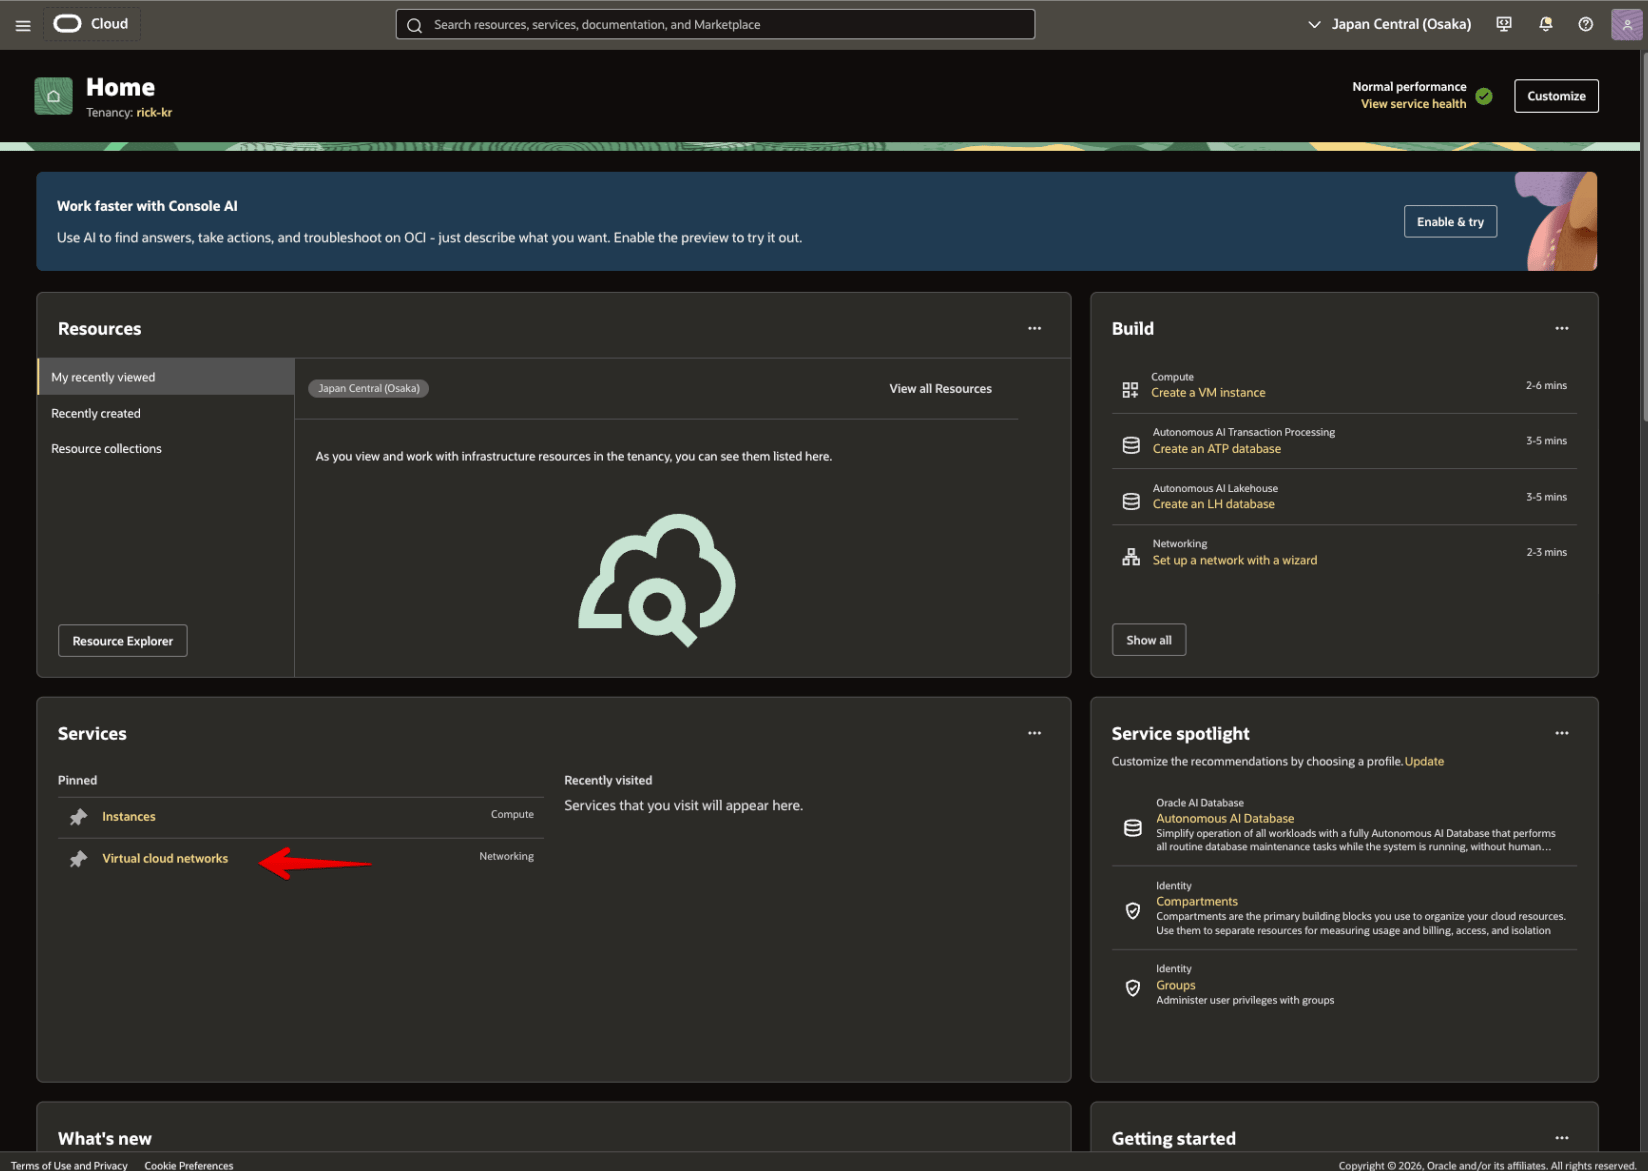
2. Create the VCN, Internet Gateway, route, subnet, and ingress rules
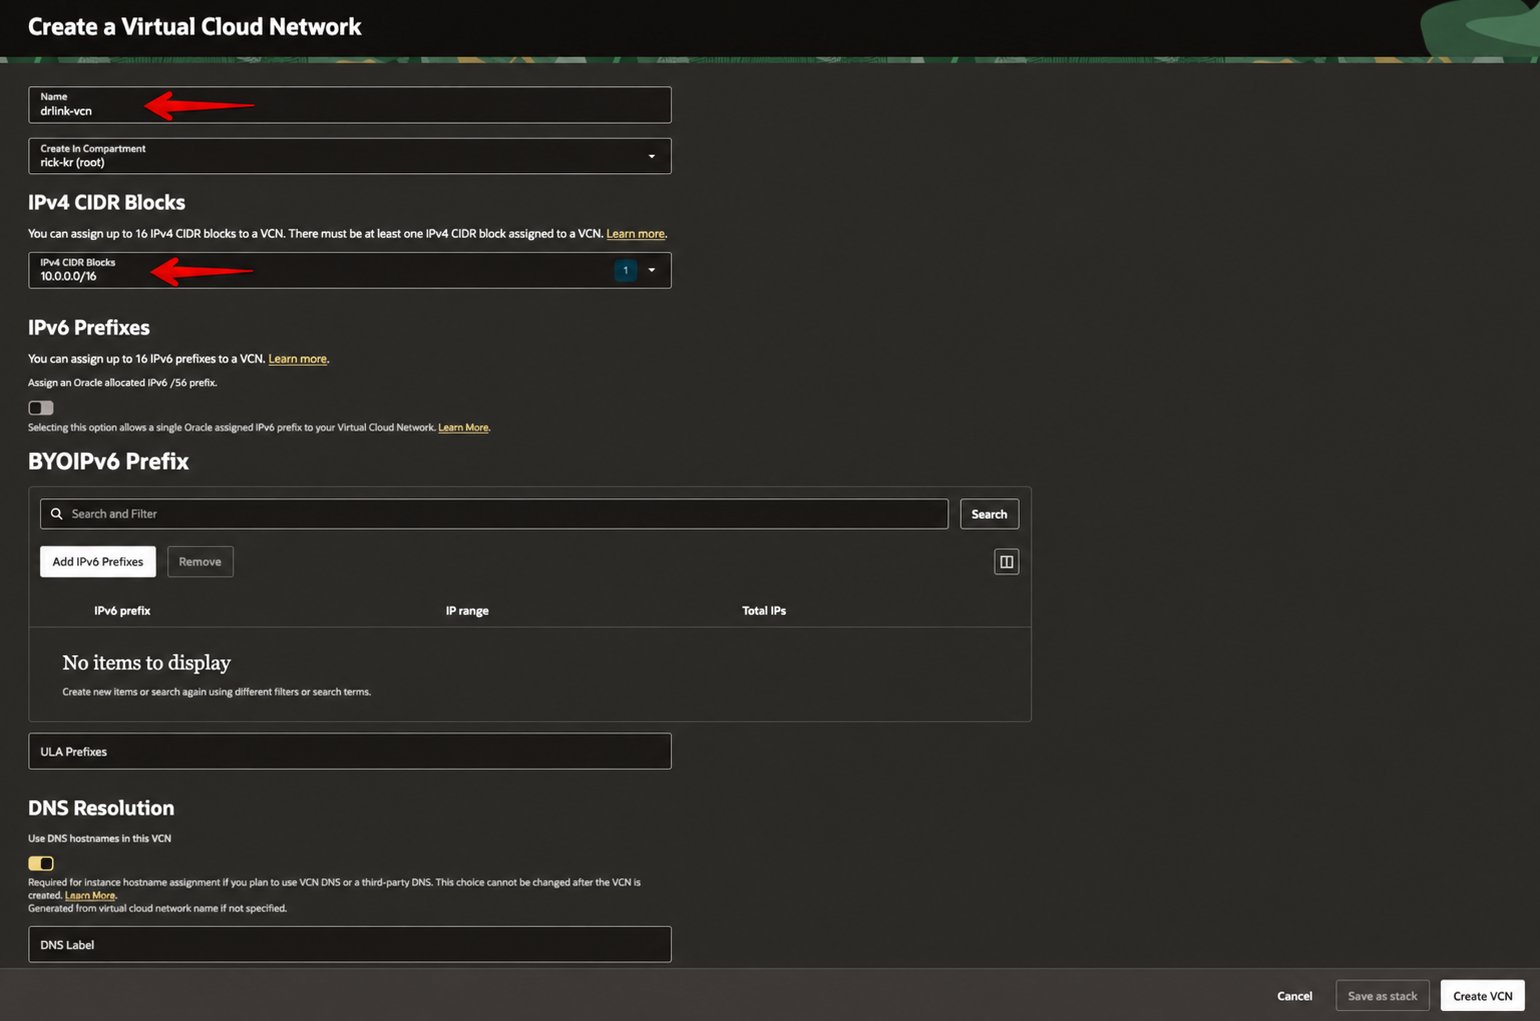
Use these values:2-1. Create the VCN
Open Virtual Cloud Networks → Create VCN.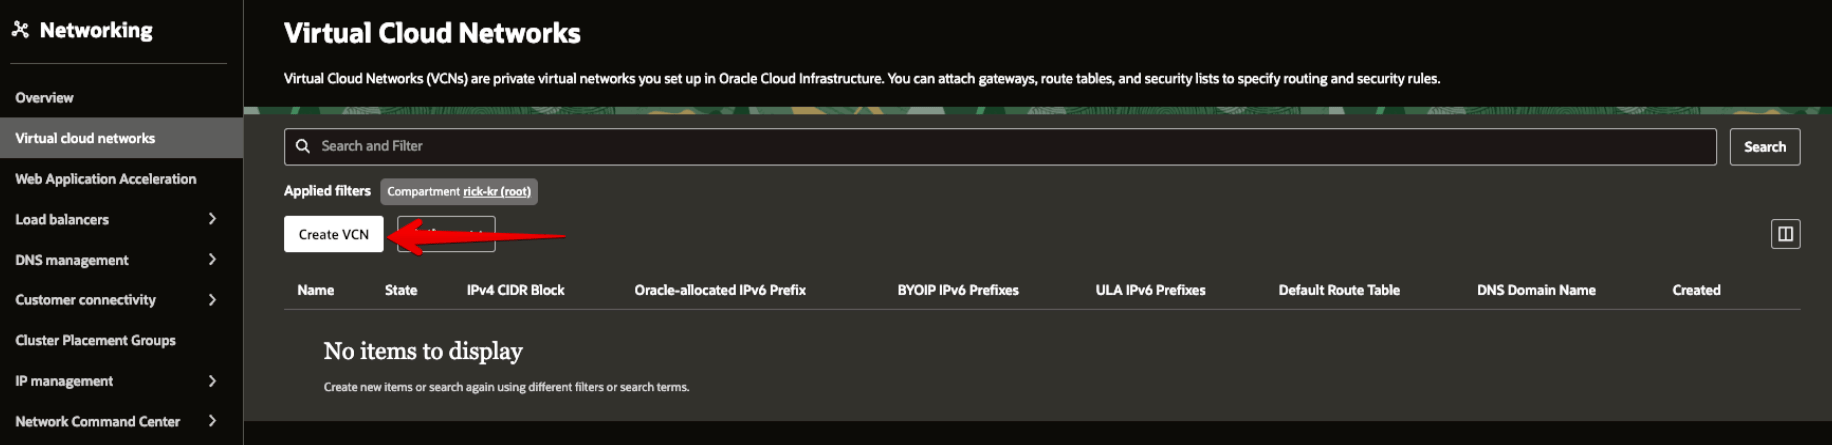
data-relay-vcn and the IPv4 CIDR to 10.0.0.0/16.
2-2. Create the Internet Gateway
In the newdata-relay-vcn, open the Gateways tab and create an Internet Gateway.
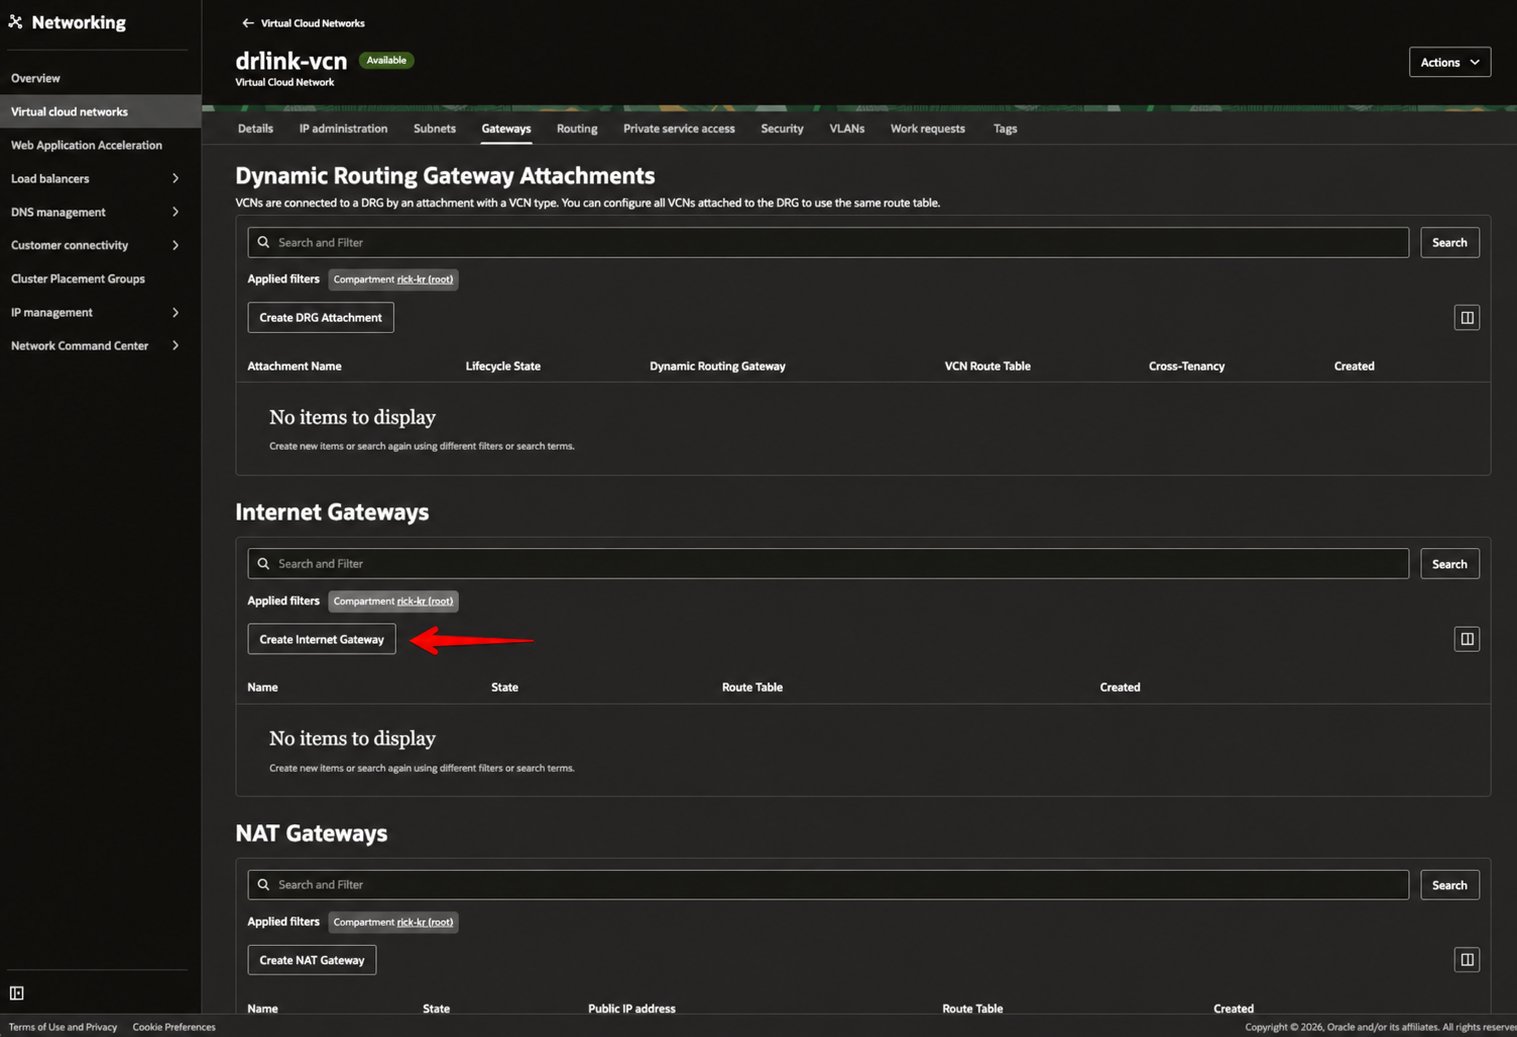
data-relay-internet-gateway as the example gateway name.
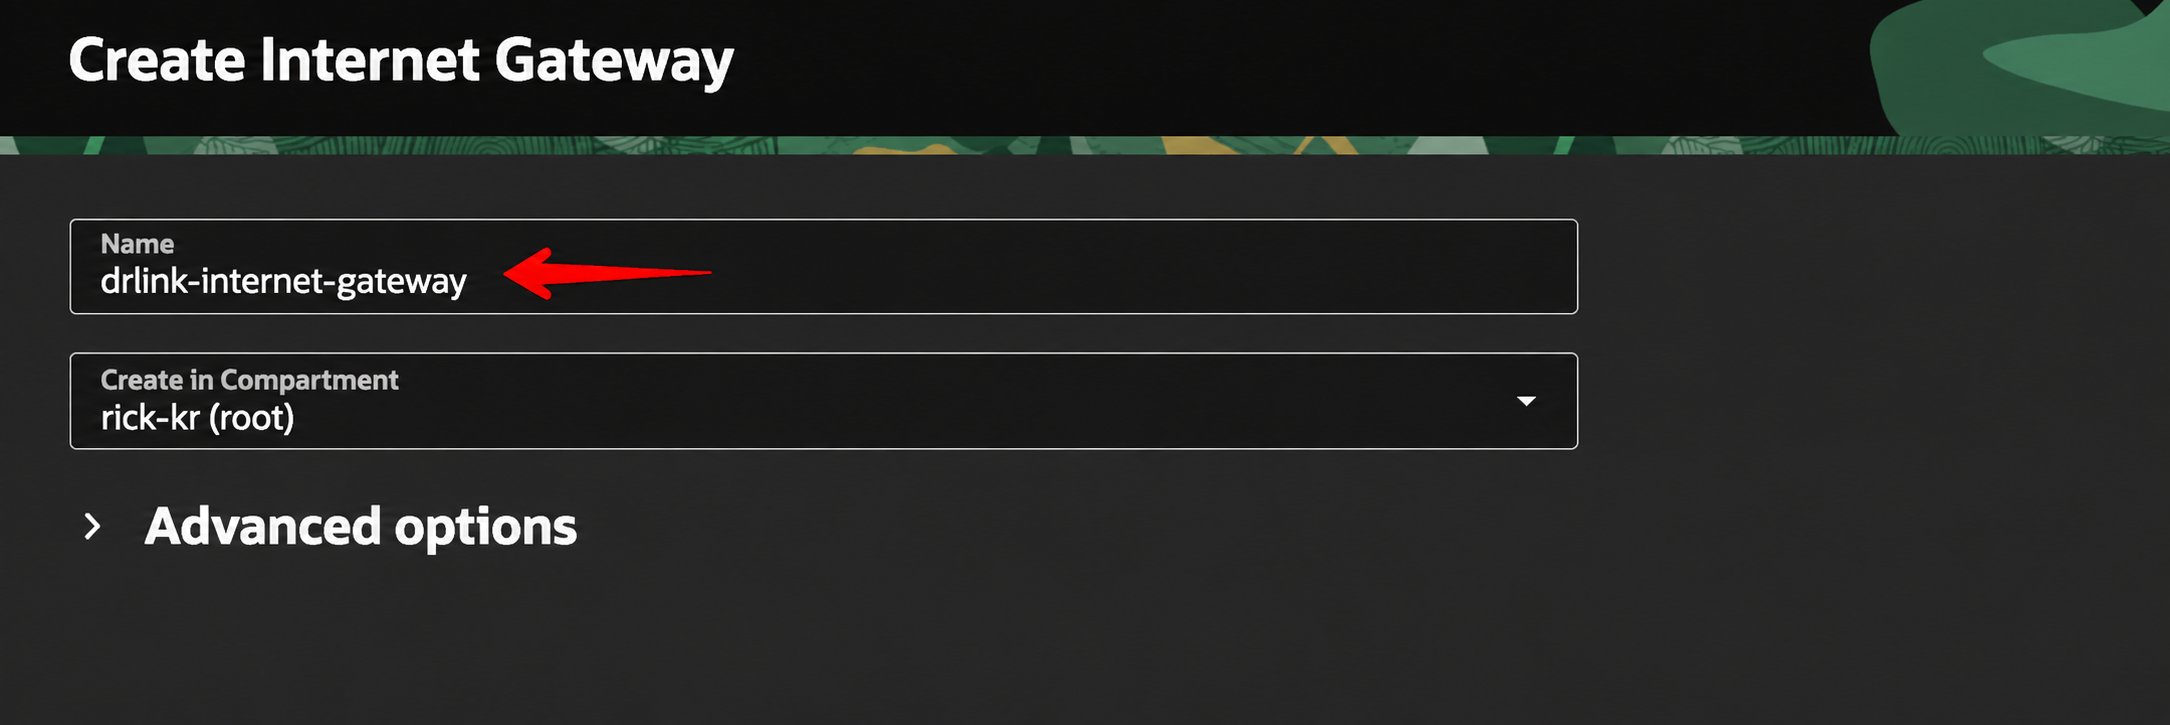
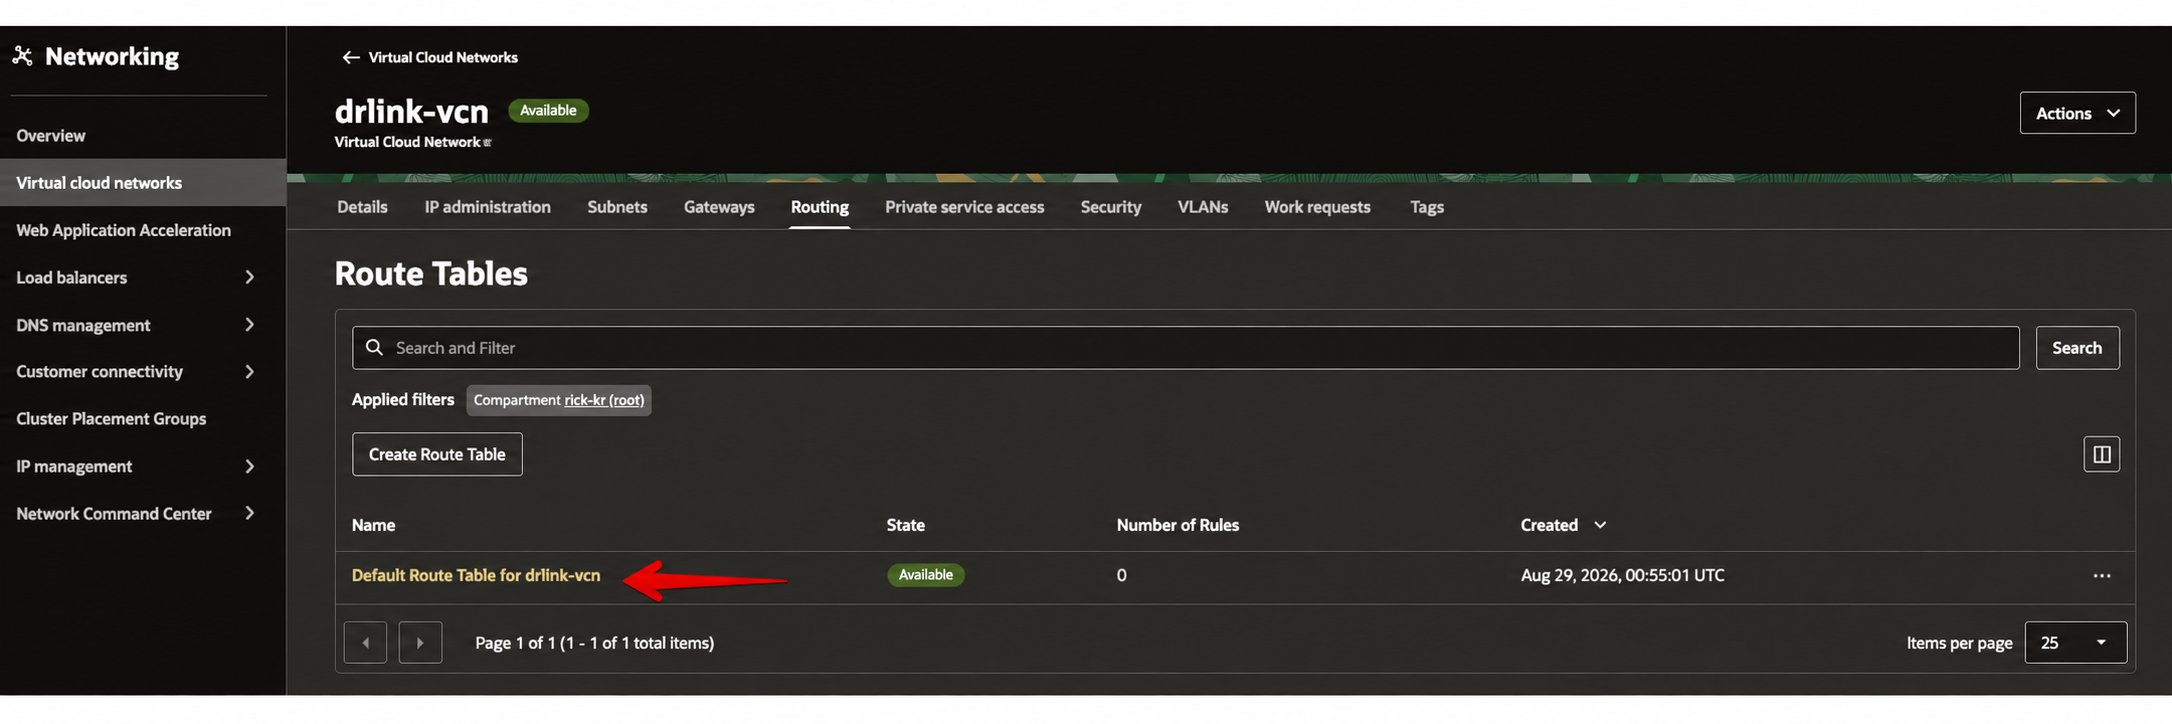
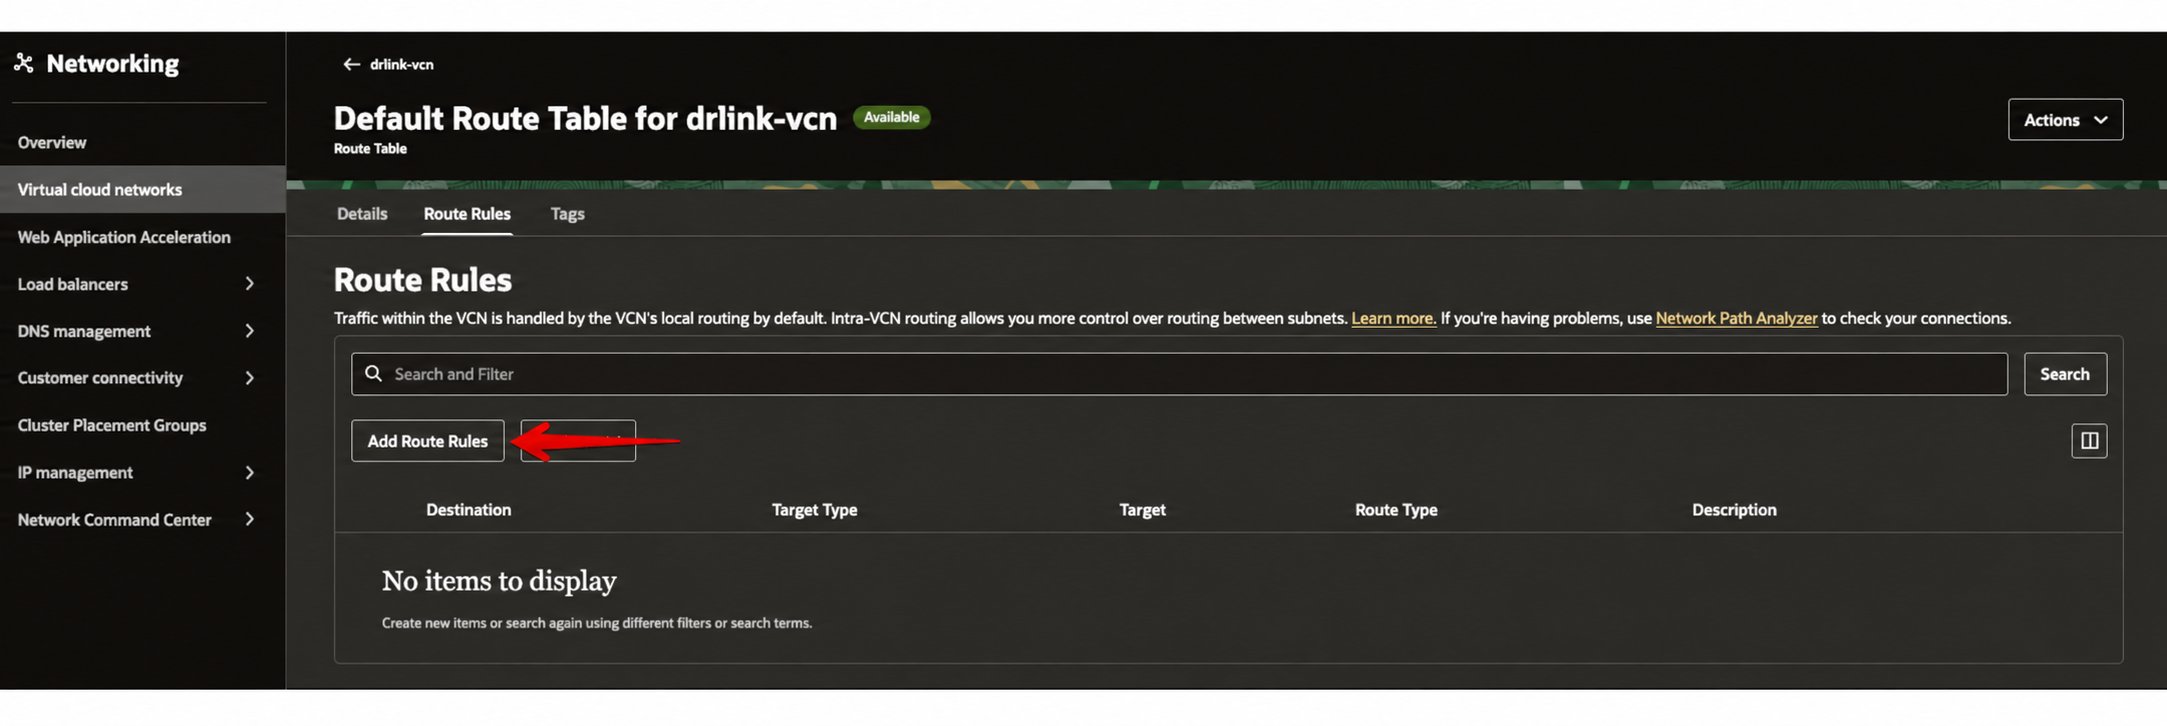
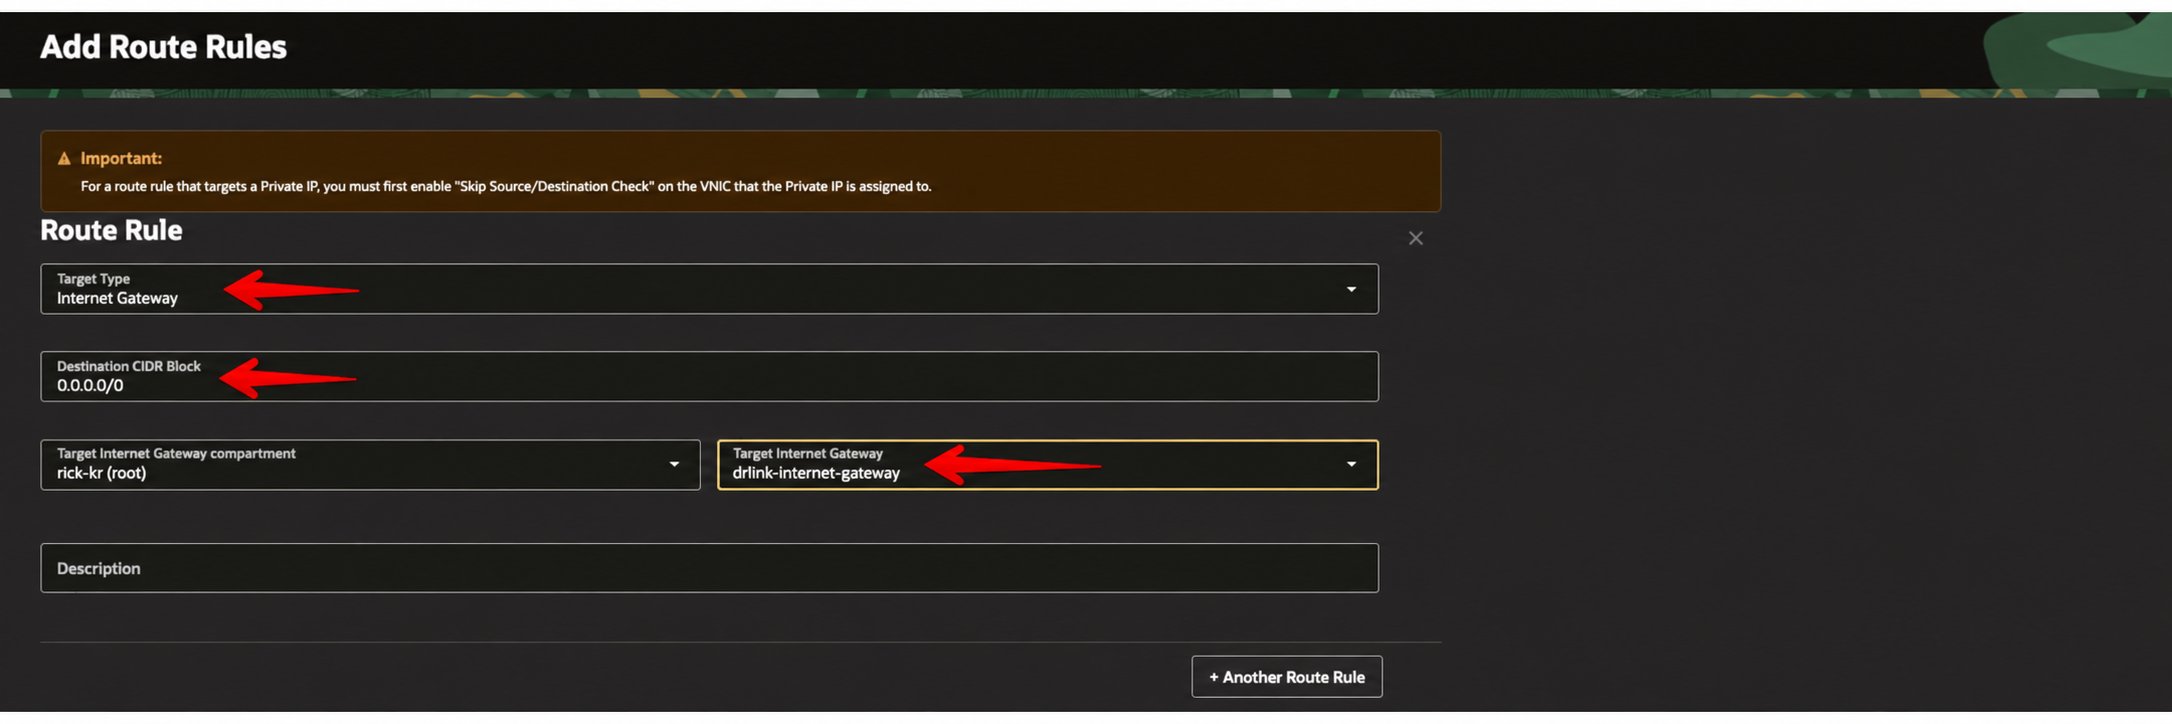
2-3. Add the Internet route to the default route table
Open the Routing tab and selectDefault Route Table for data-relay-vcn.
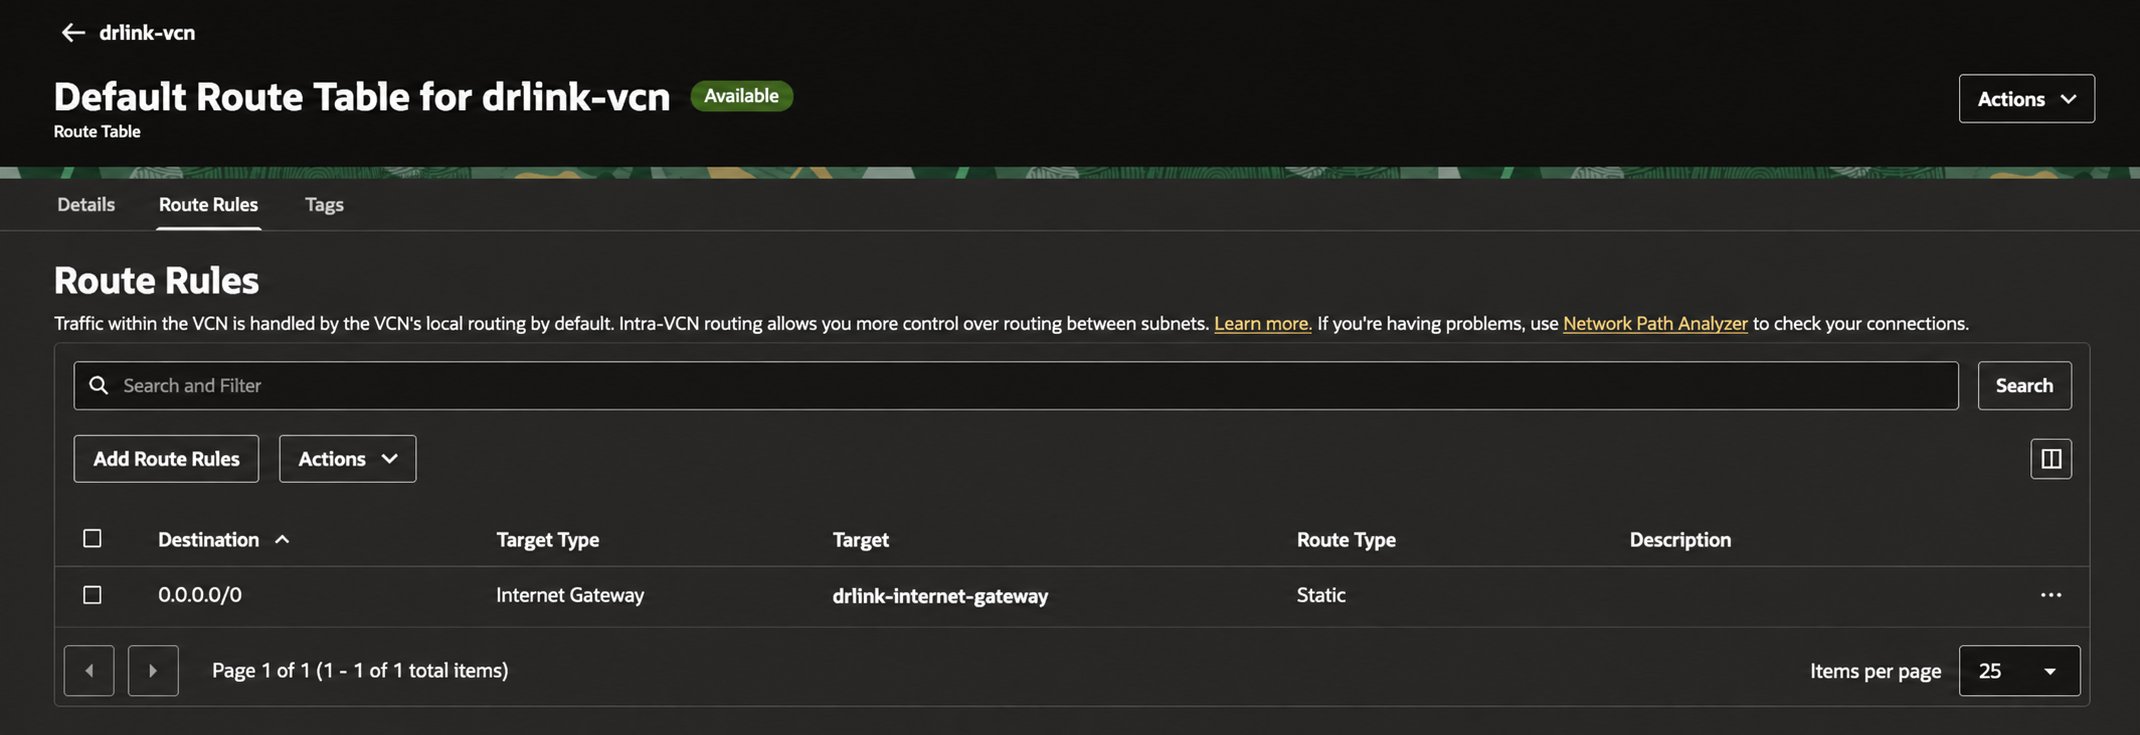
2-4. Start creating the public subnet
Open the Subnets tab and select Create Subnet.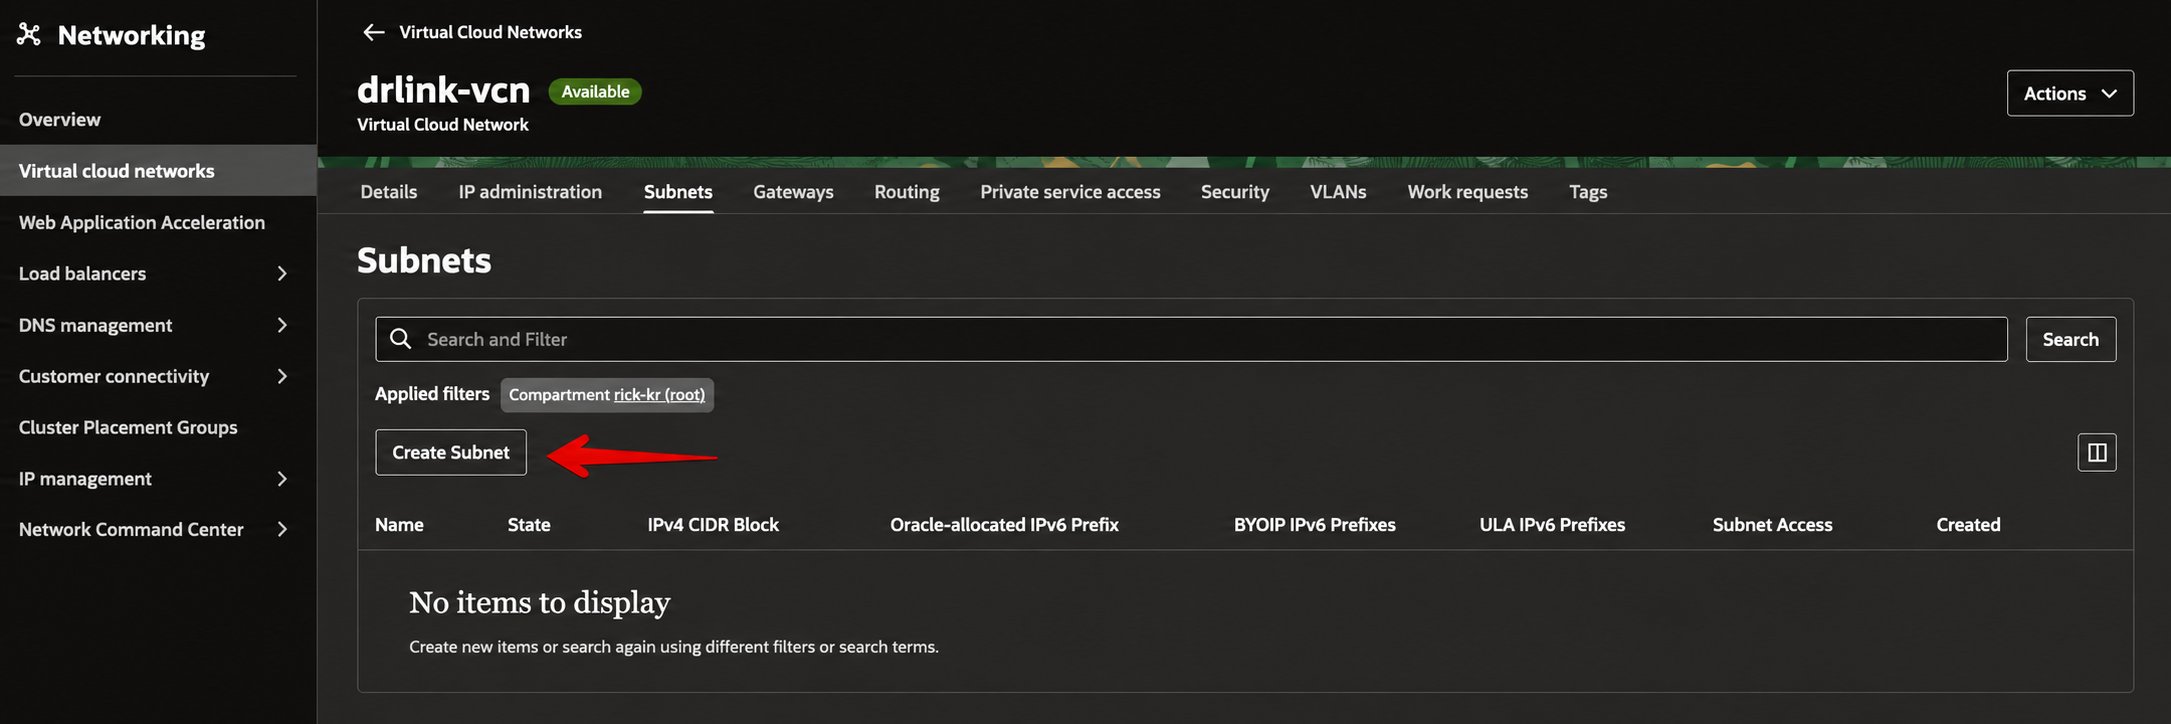
2-5. Configure the public subnet
Create the public subnet with the following values: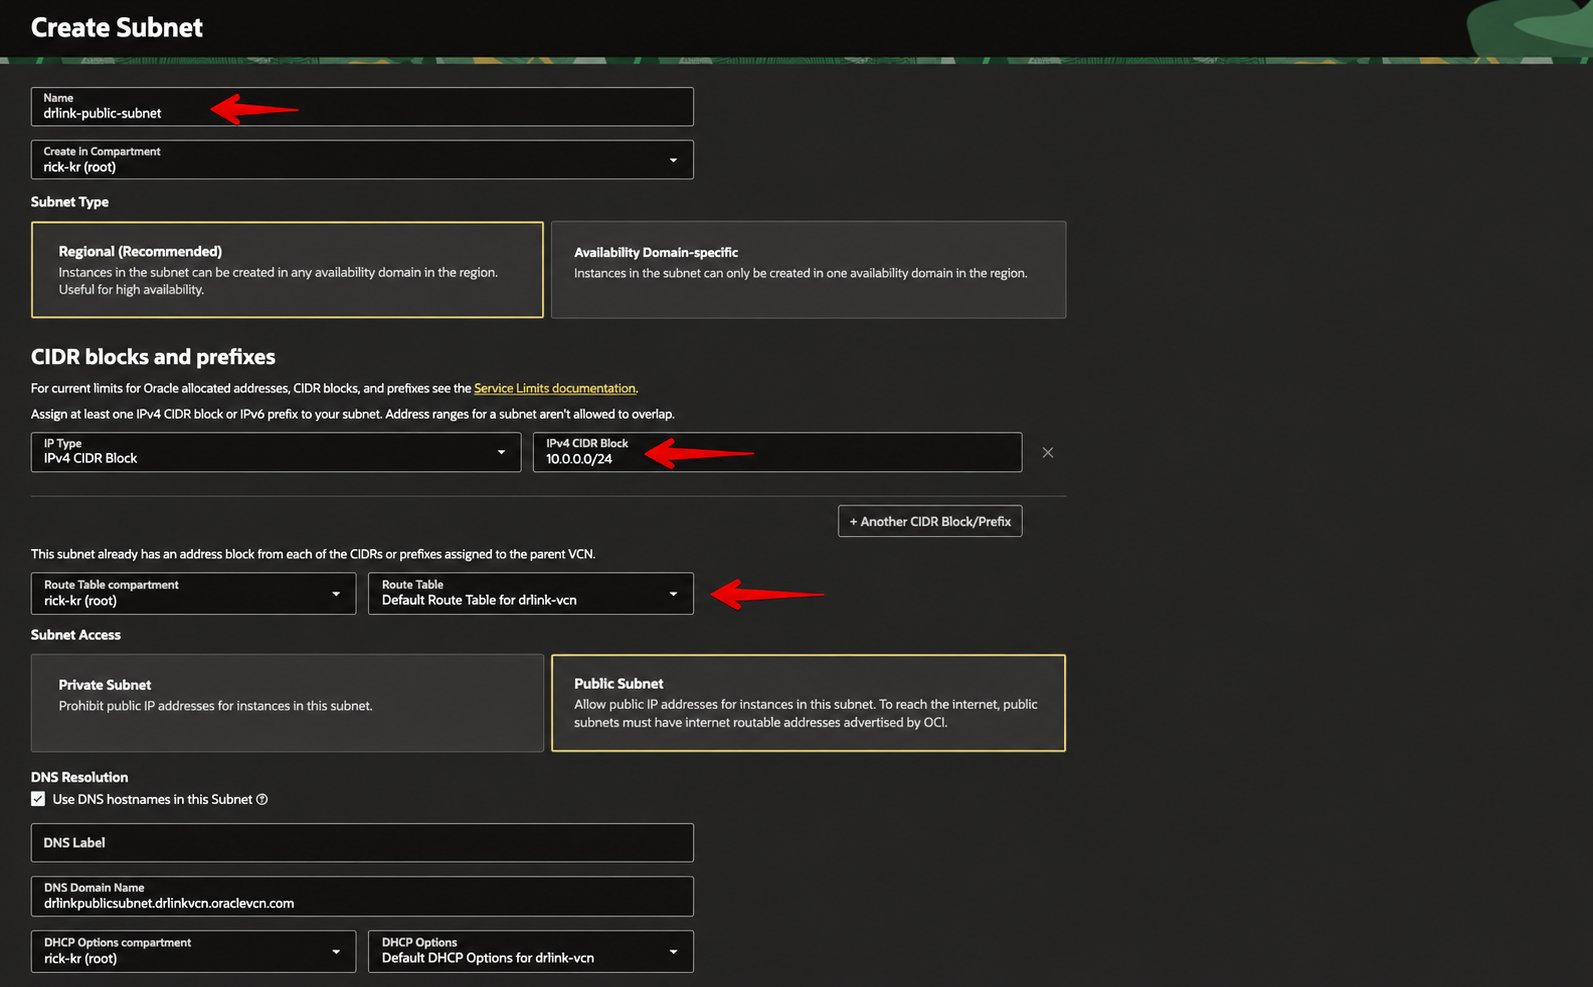
2-6. Configure the Security List
Open the VCN’s Security Lists page.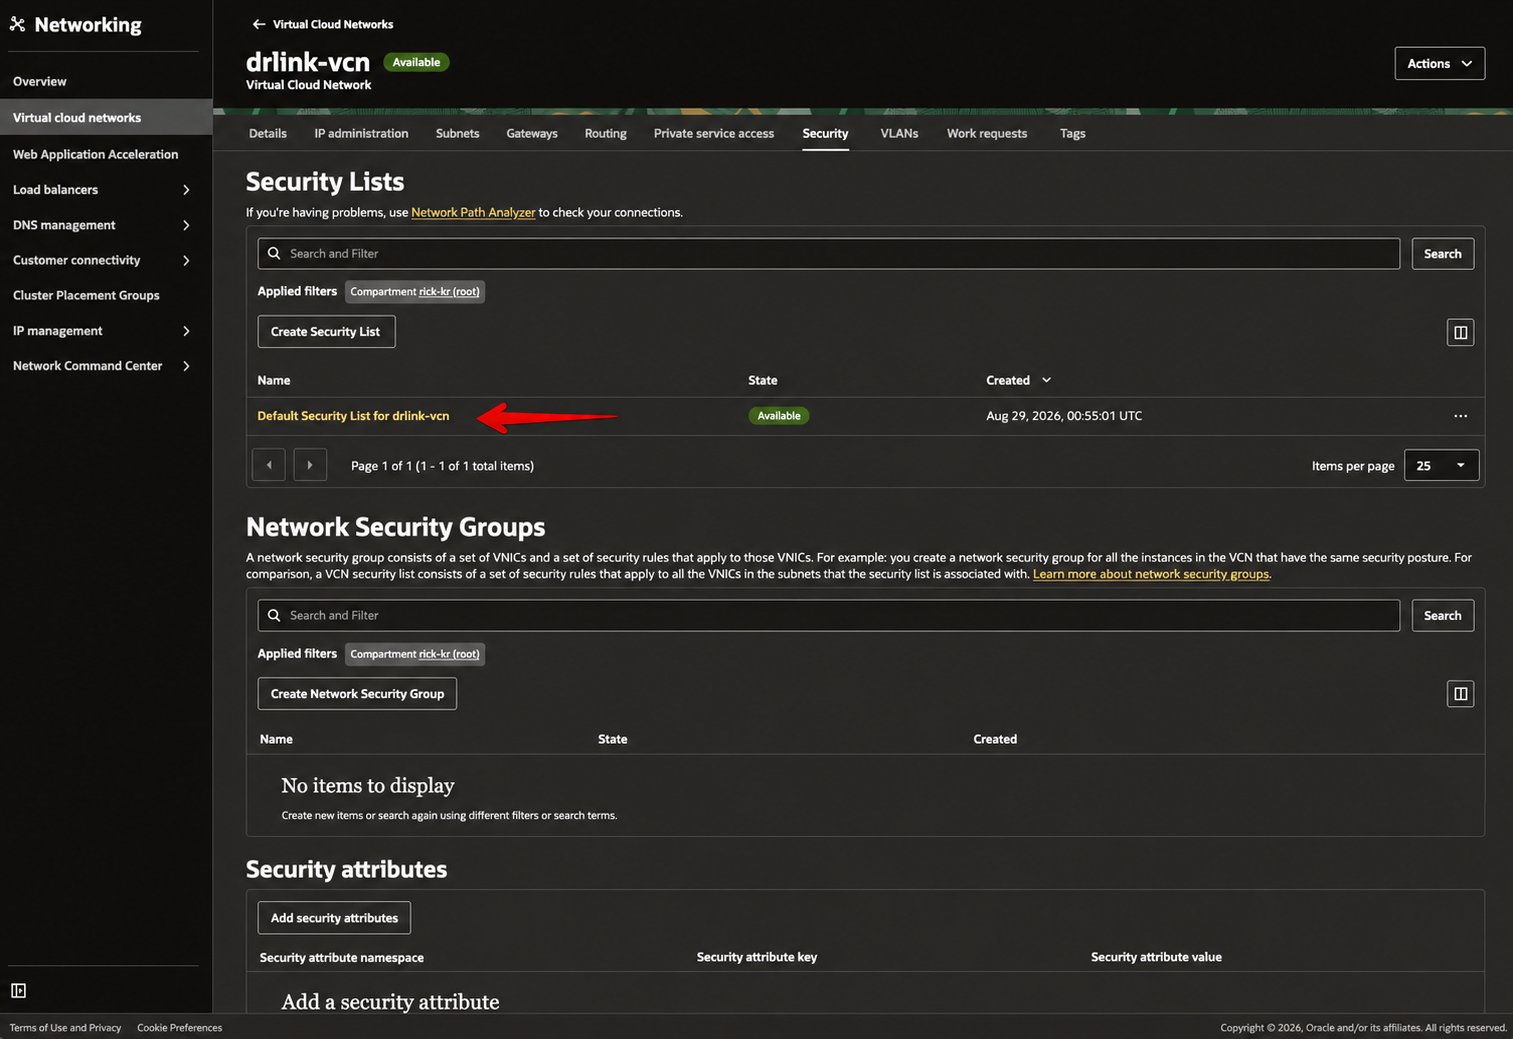
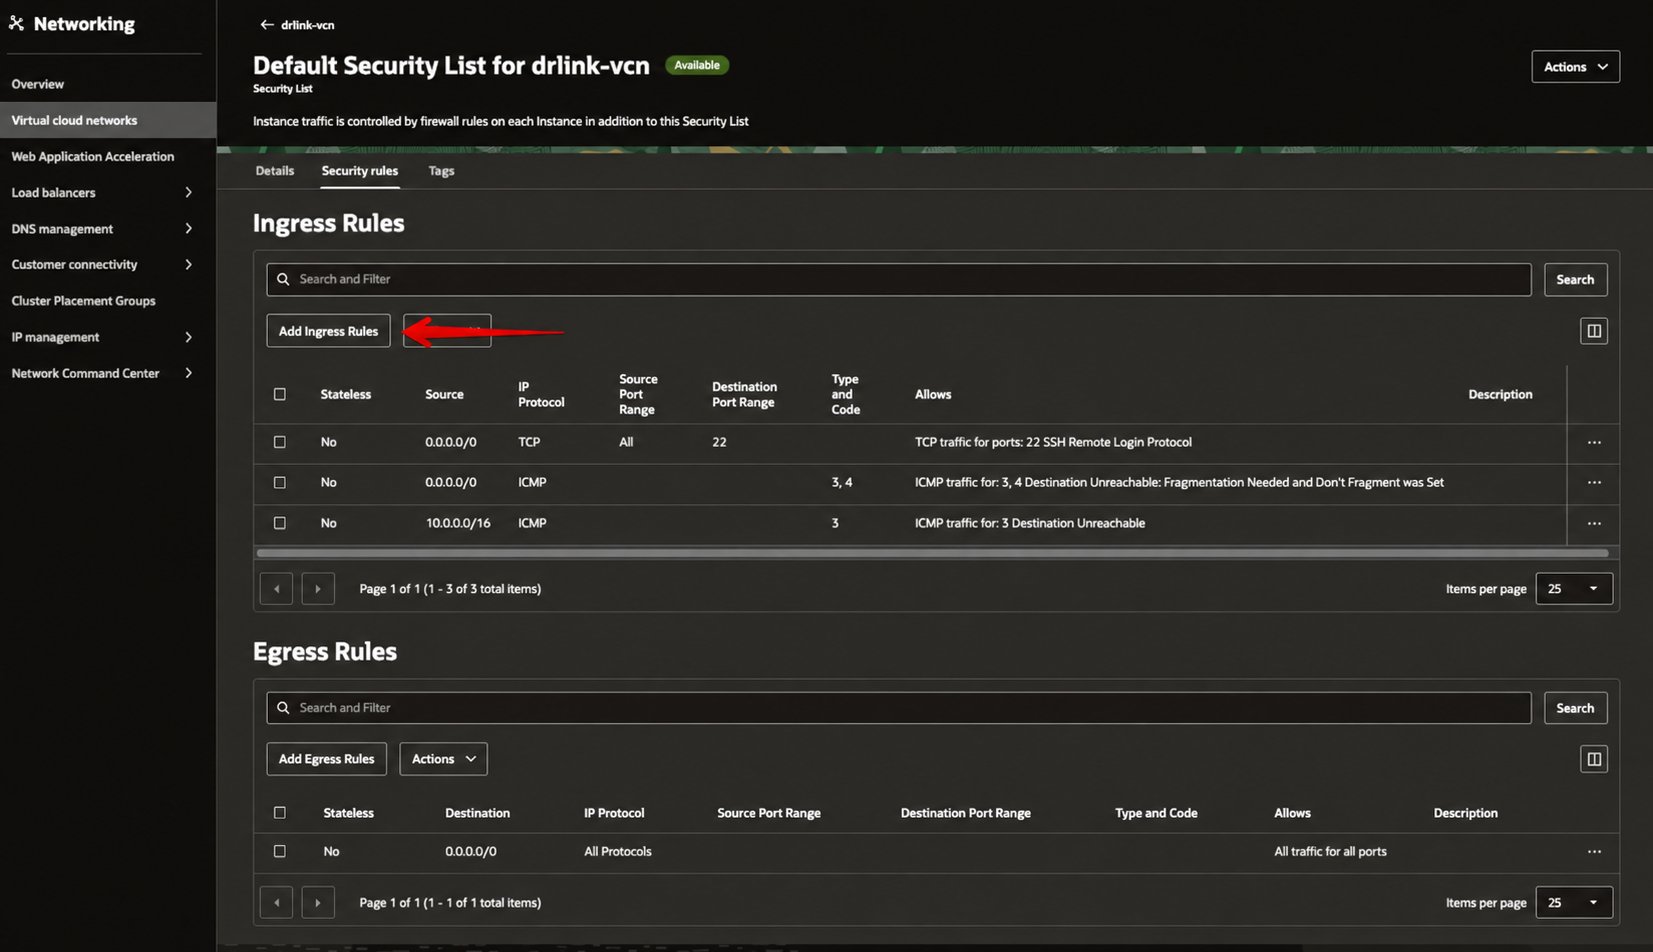
/32.
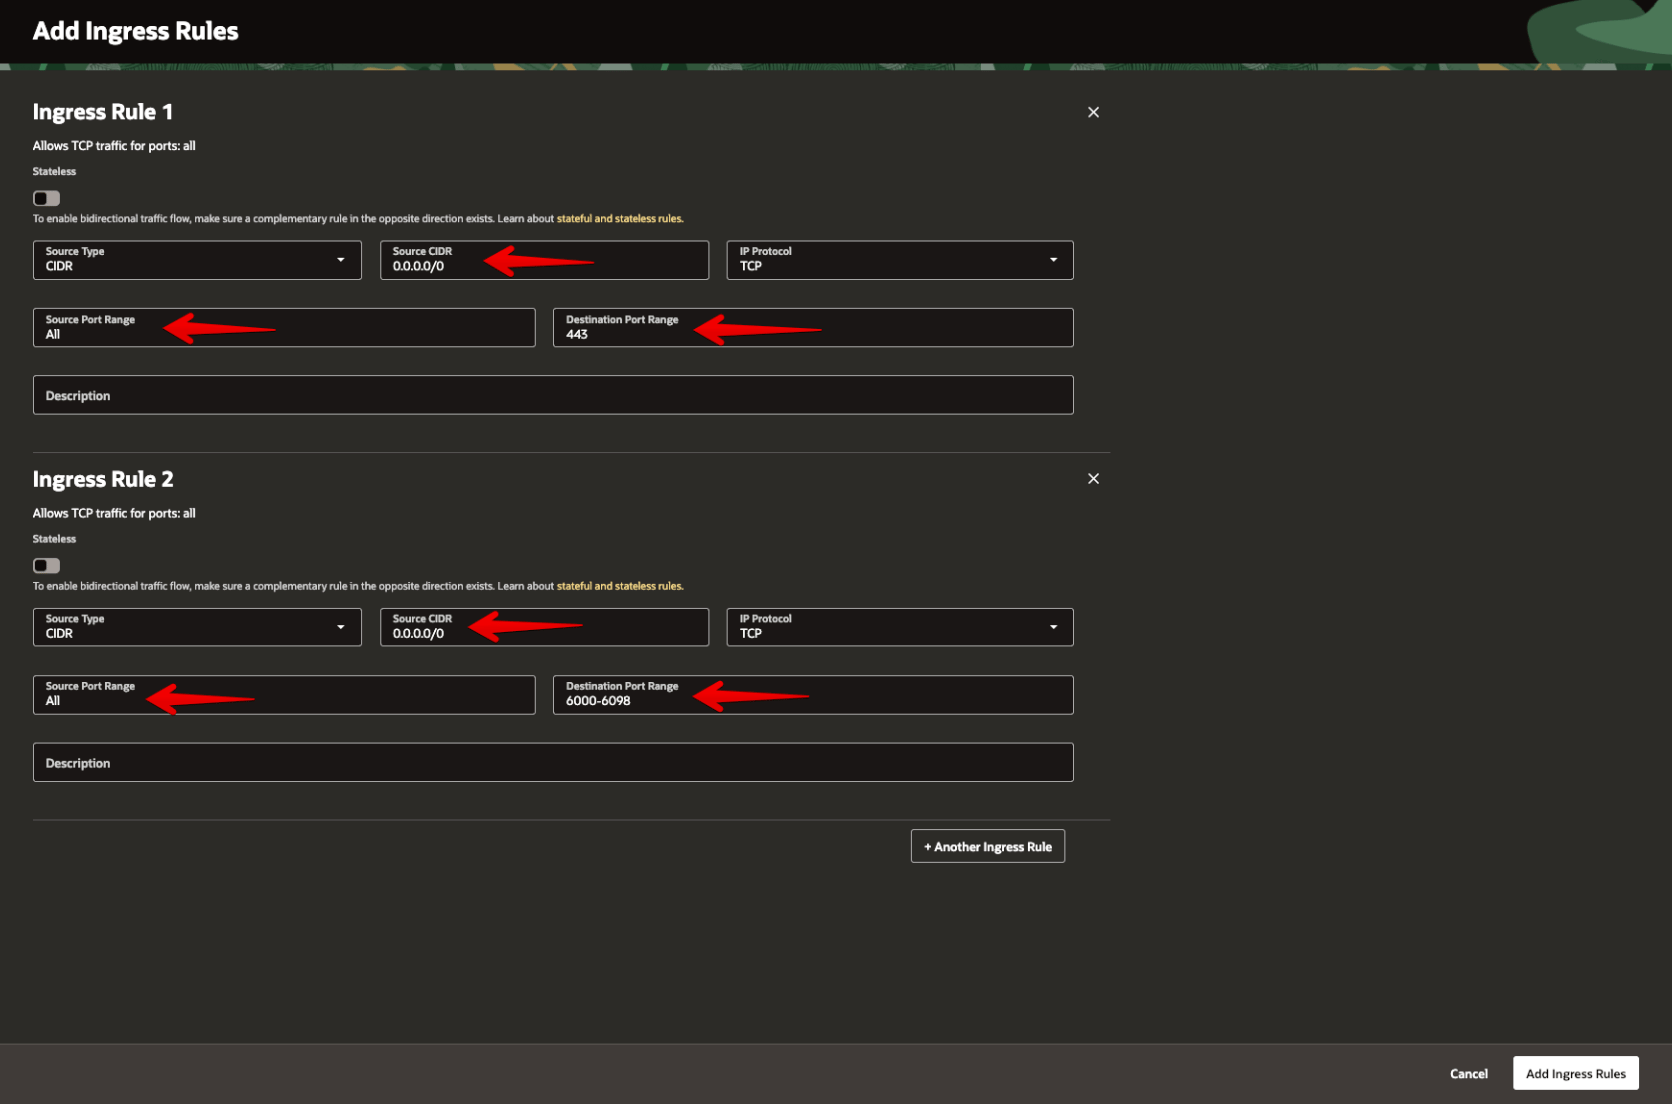
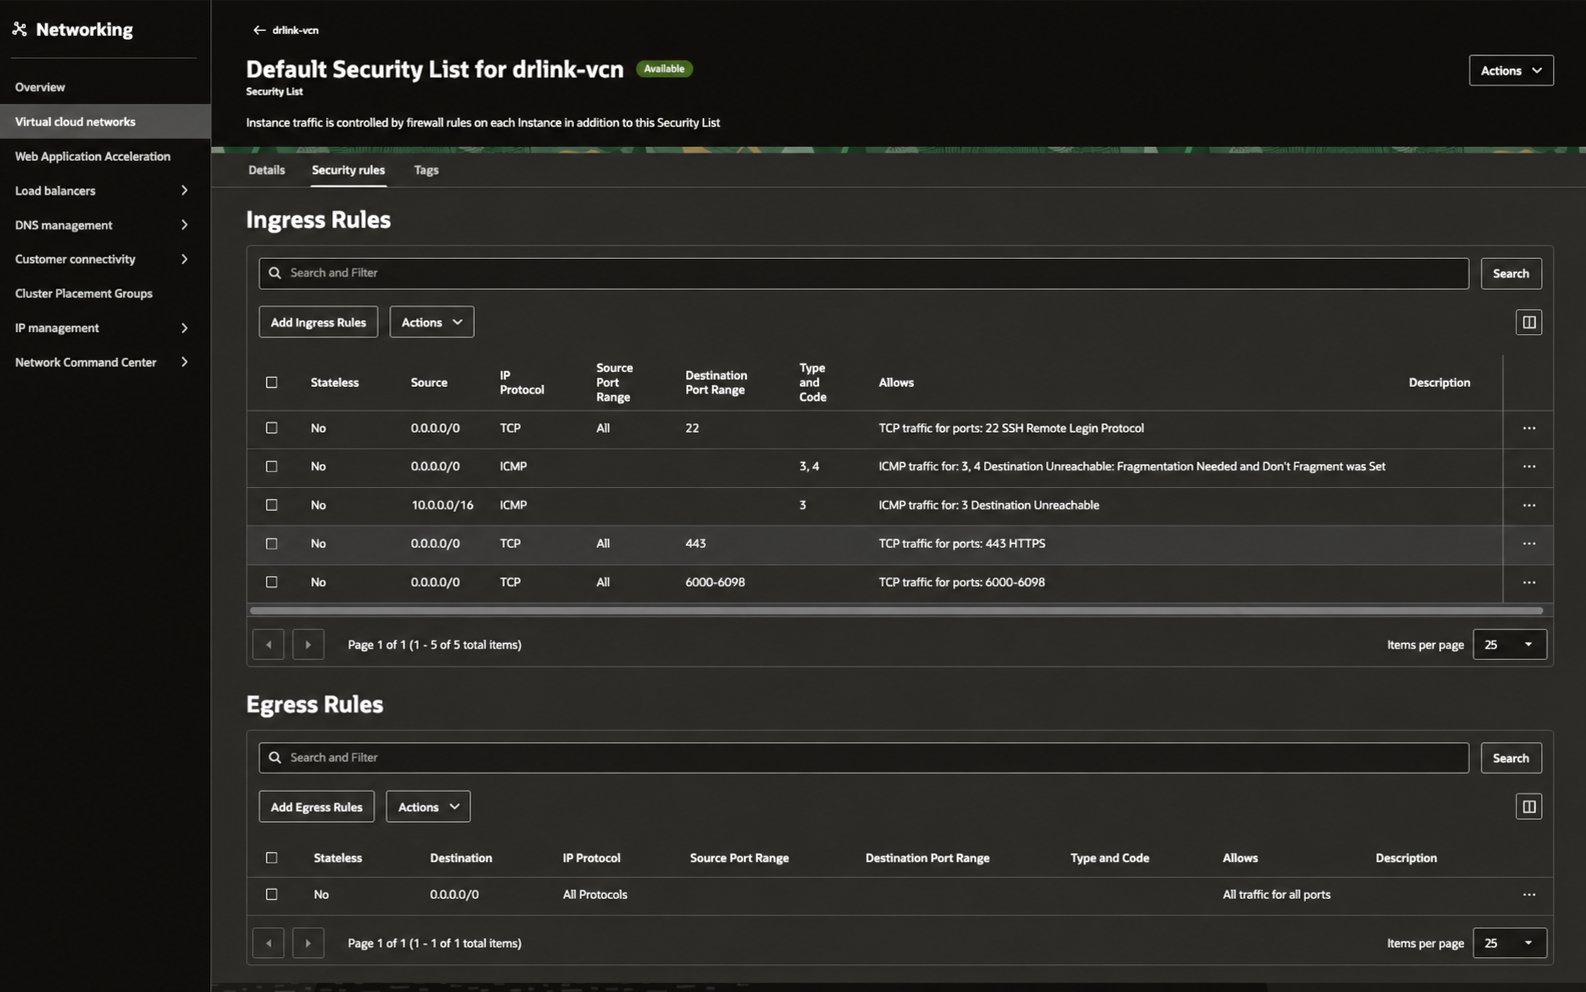
Recommended single-443 ingress
If you do not want the whole
6000-6098 range exposed, allow only the service ports that are actually assigned, and constrain source CIDRs where possible.
3. Create the Ubuntu compute instance
Recommended values for this walkthrough: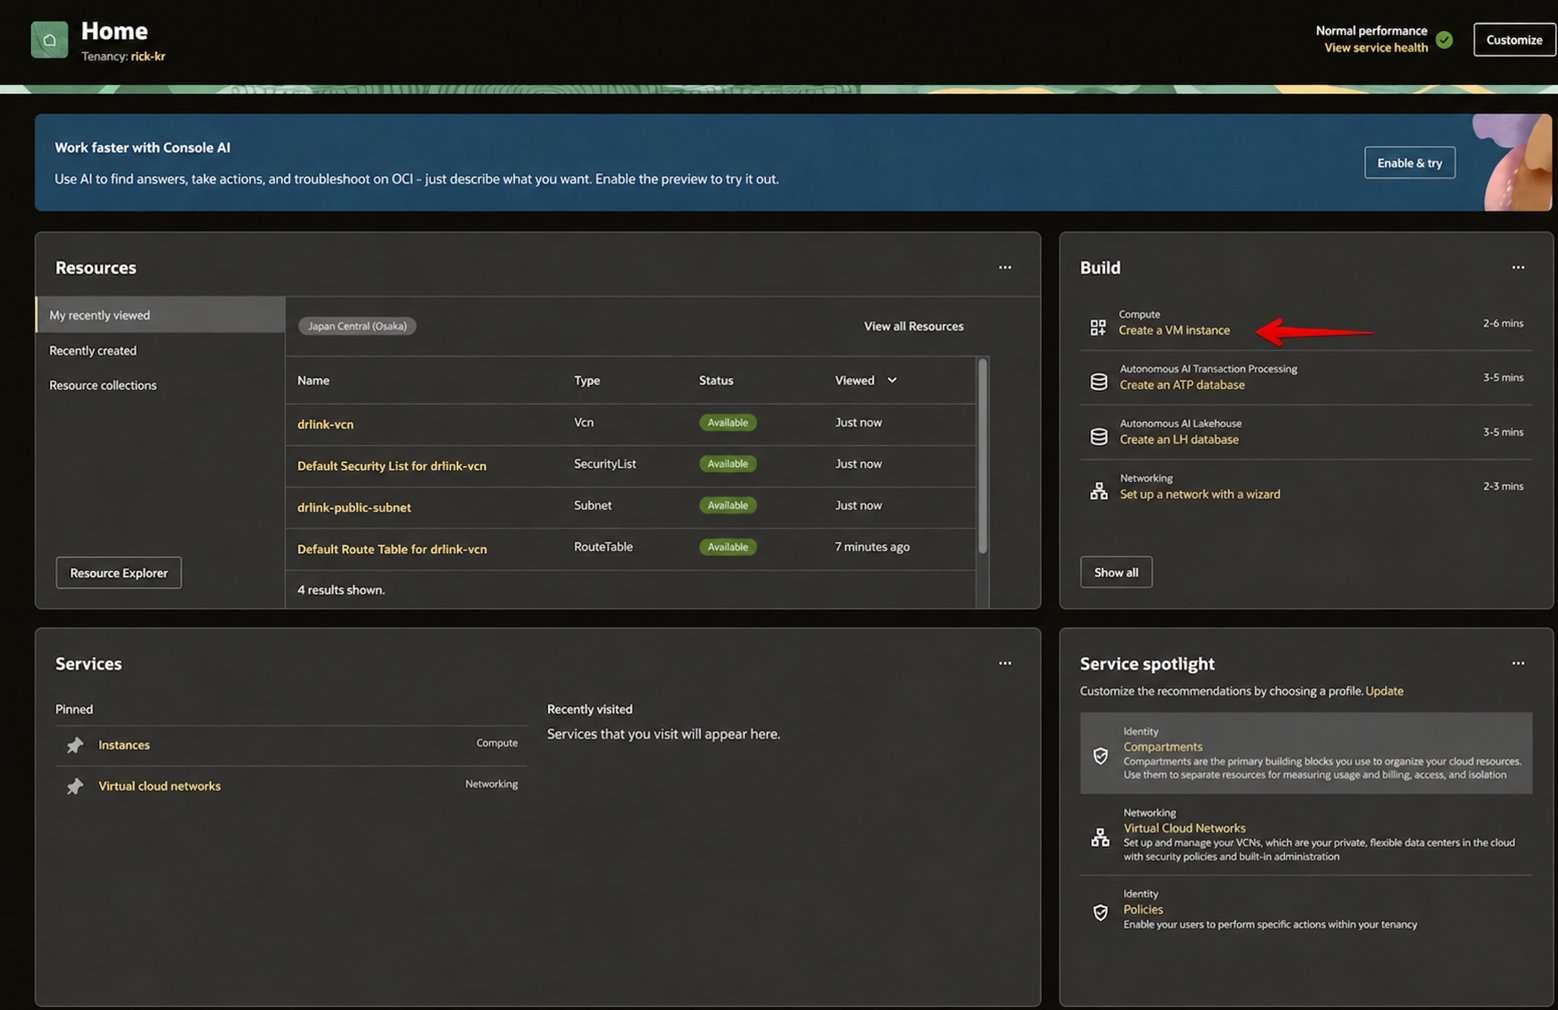
3-1. Enter the basic Compute Instance settings
Start on Create compute instance and confirm the instance name and placement.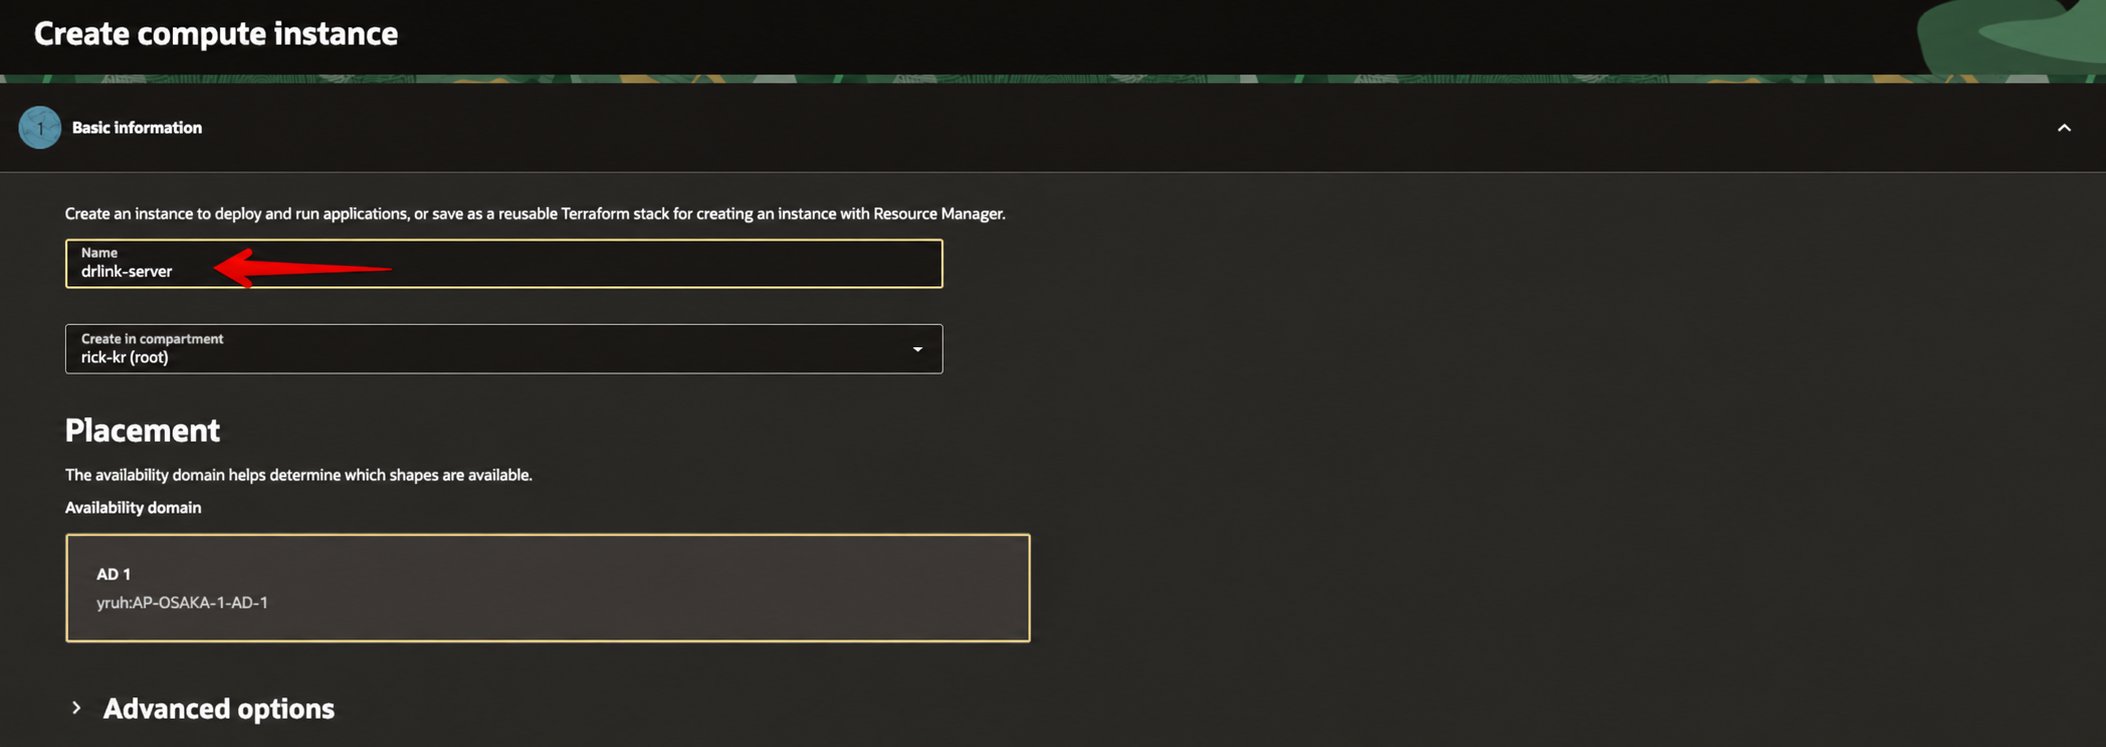
3-2. Select Canonical Ubuntu 24.04
Choose Change image and select Canonical Ubuntu 24.04. Treat the image/version currently shown in OCI Console as authoritative.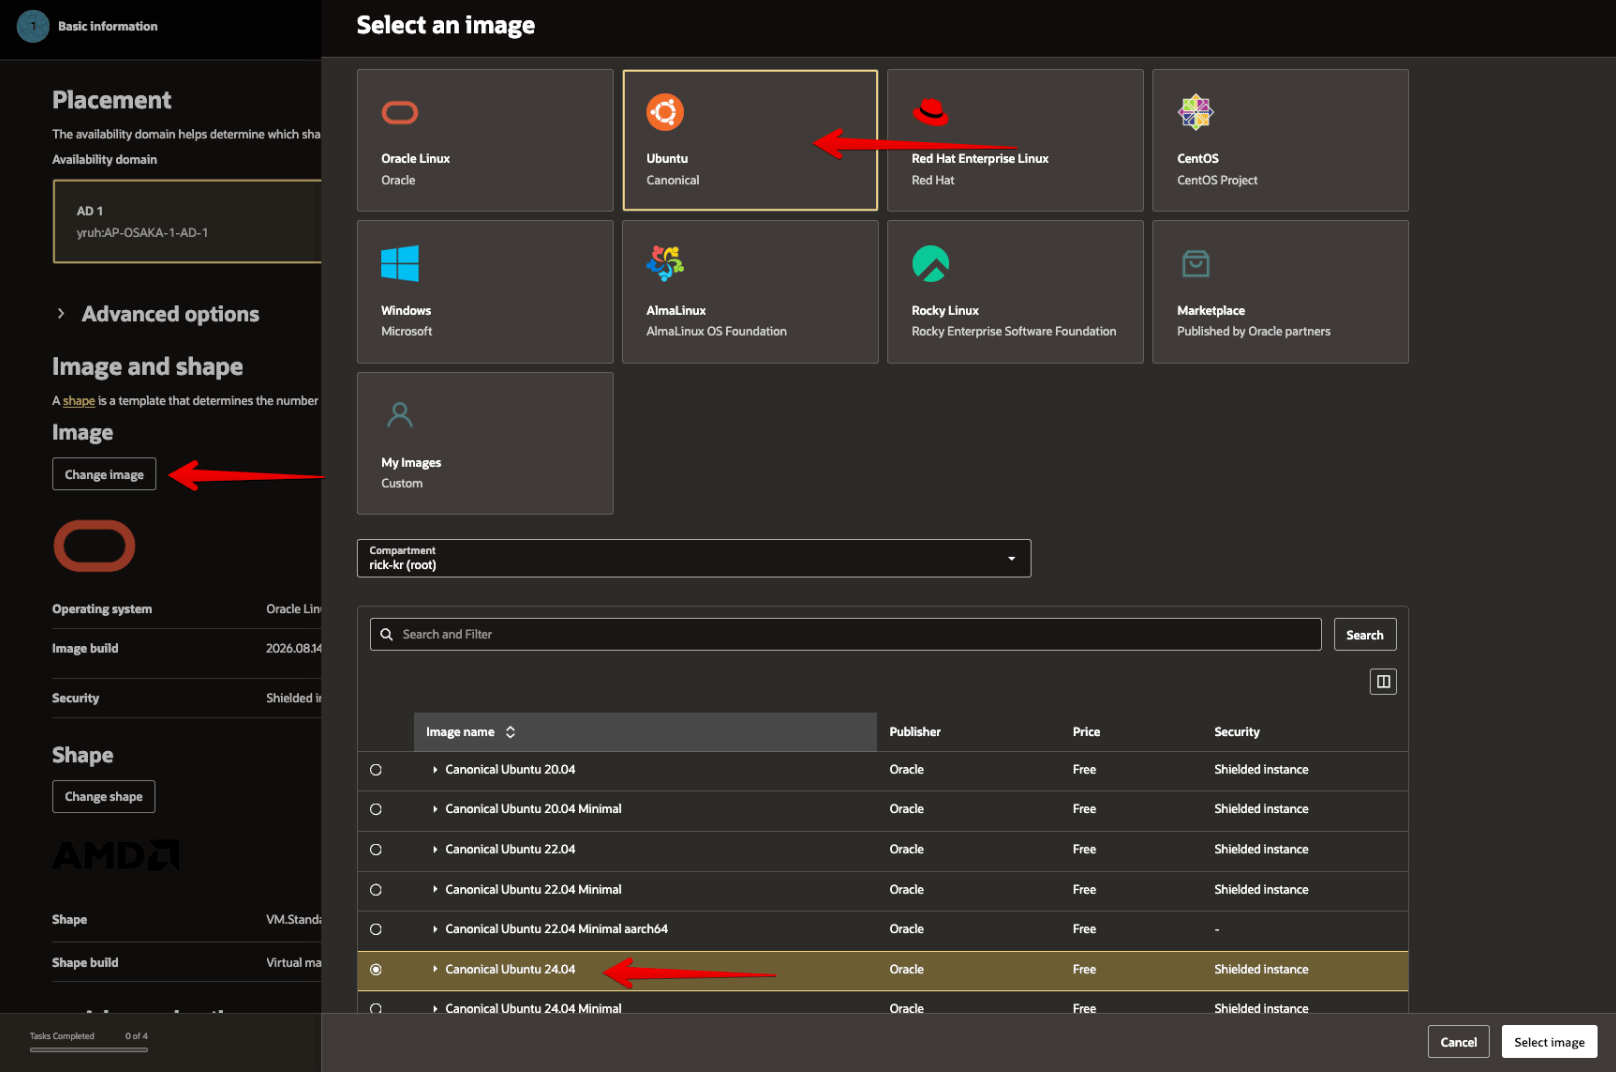
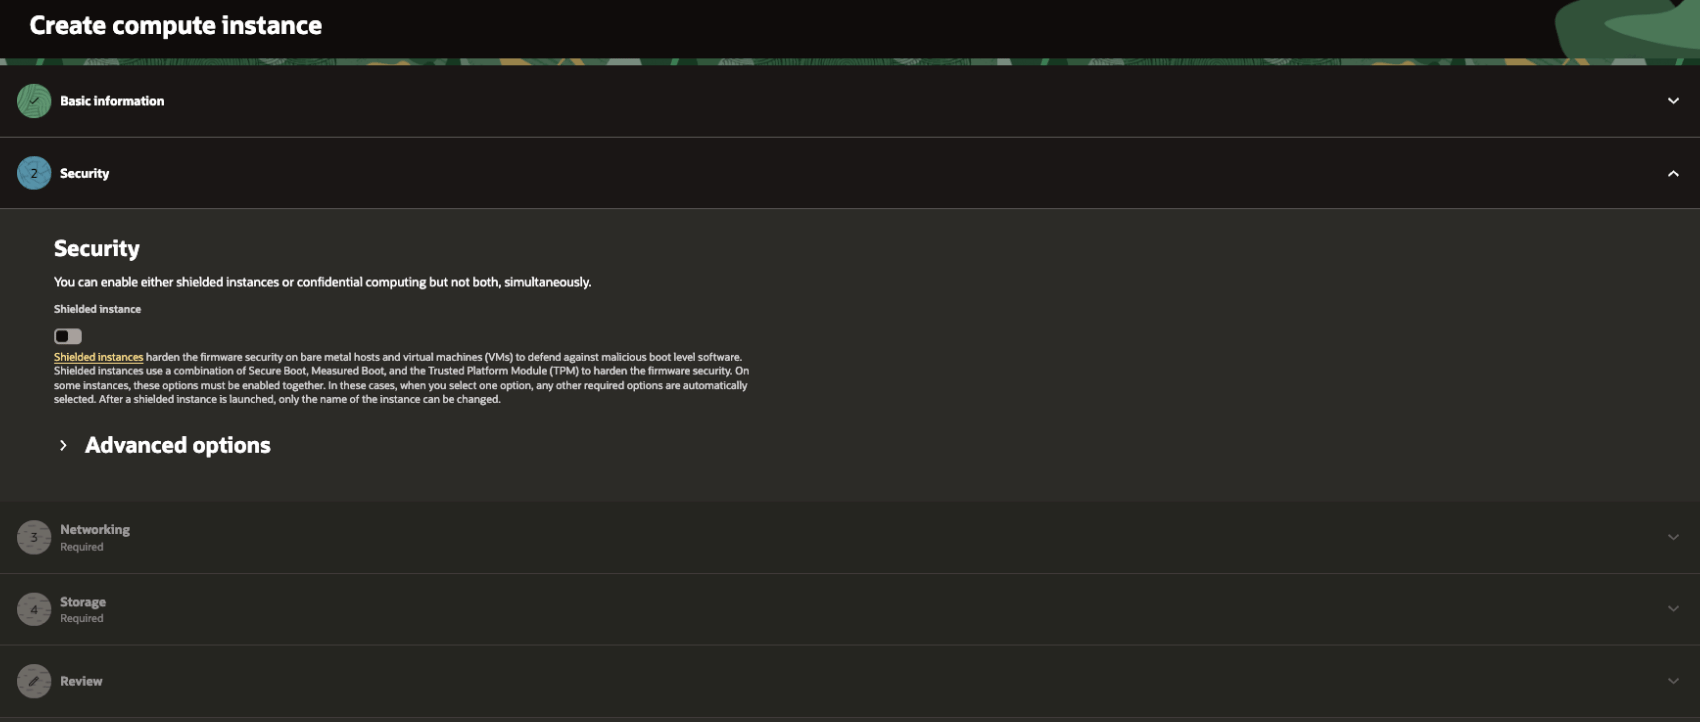
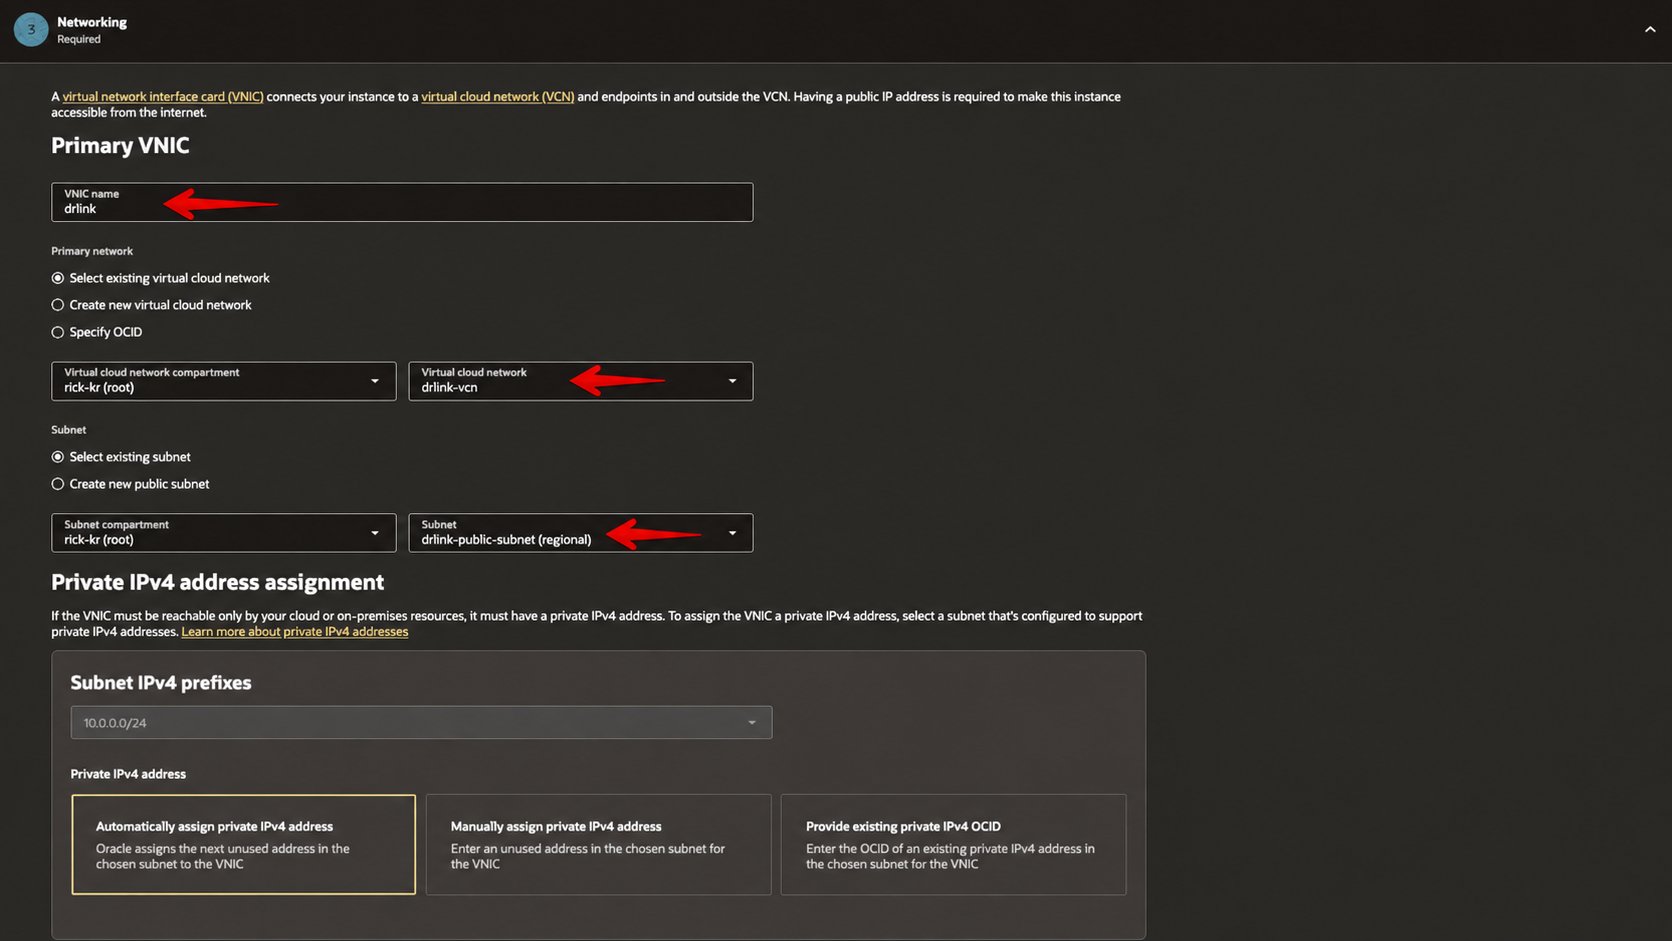
3-3. Select the VCN and public subnet
Under Primary VNIC, select thedata-relay-vcn and data-relay-public-subnet created earlier.
3-4. Disable automatic public IPv4 and configure the SSH key
Because this guide attaches a Reserved Public IP later, turn off Automatically assign public IPv4 address. Then upload an existing SSH public key or let OCI generate a new key pair, and store the private key securely.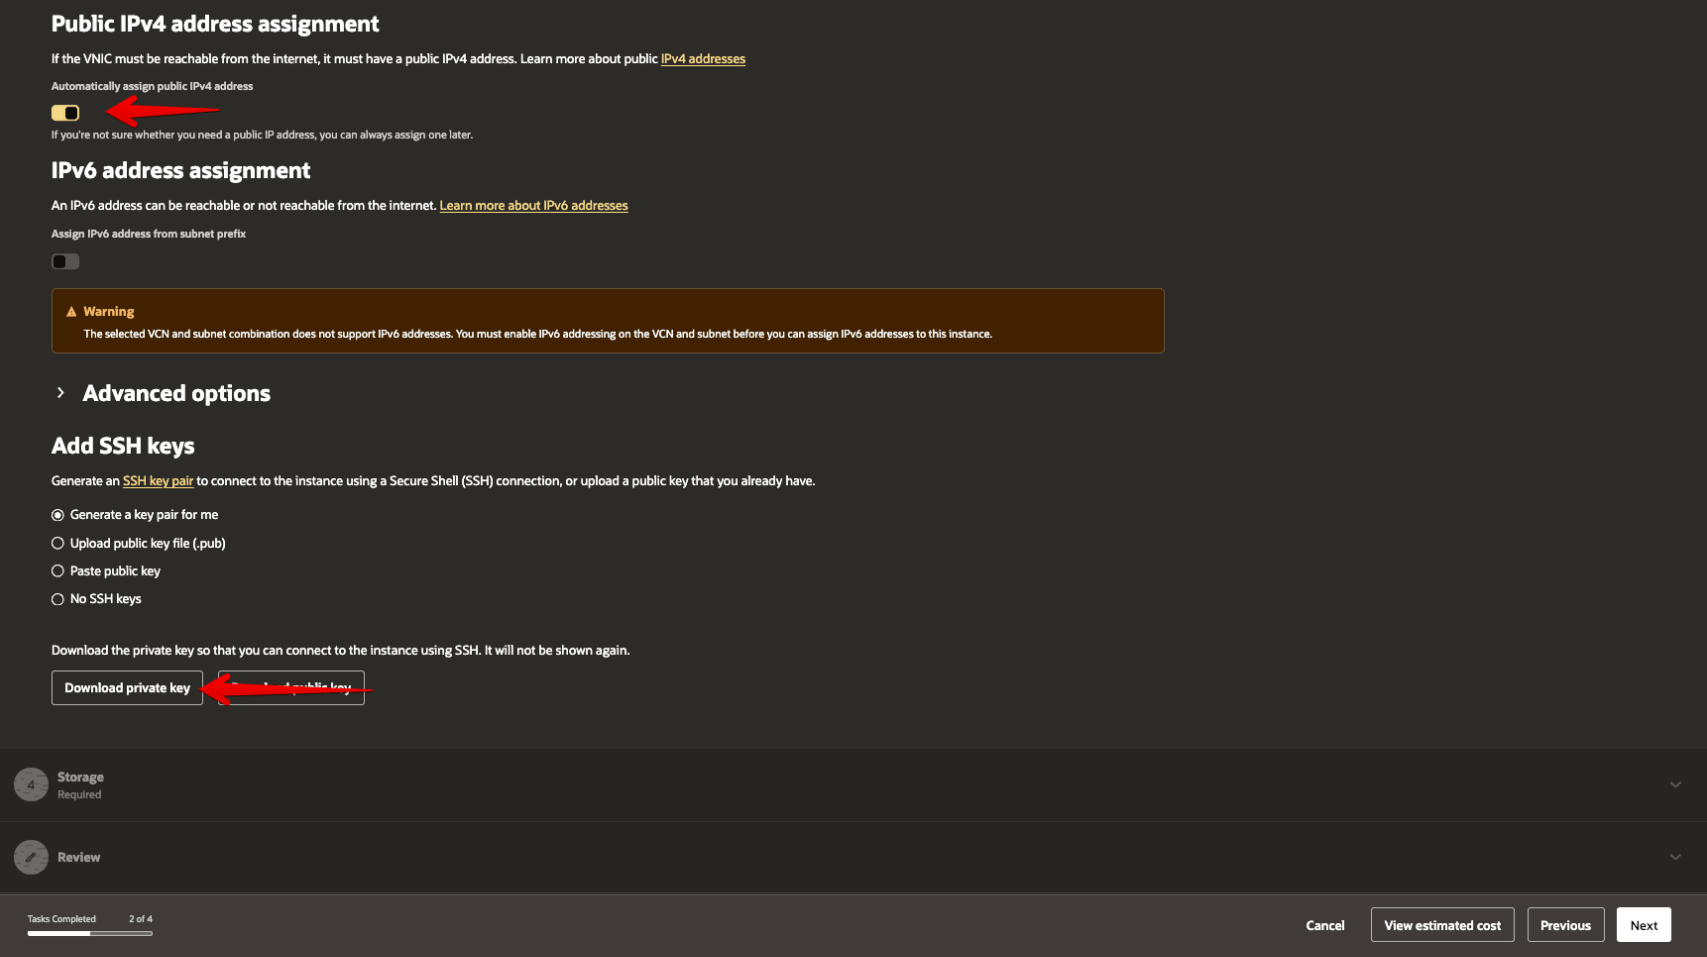
3-5. Review the boot volume
Unless you have a separate storage requirement, keep the boot-volume settings at their defaults.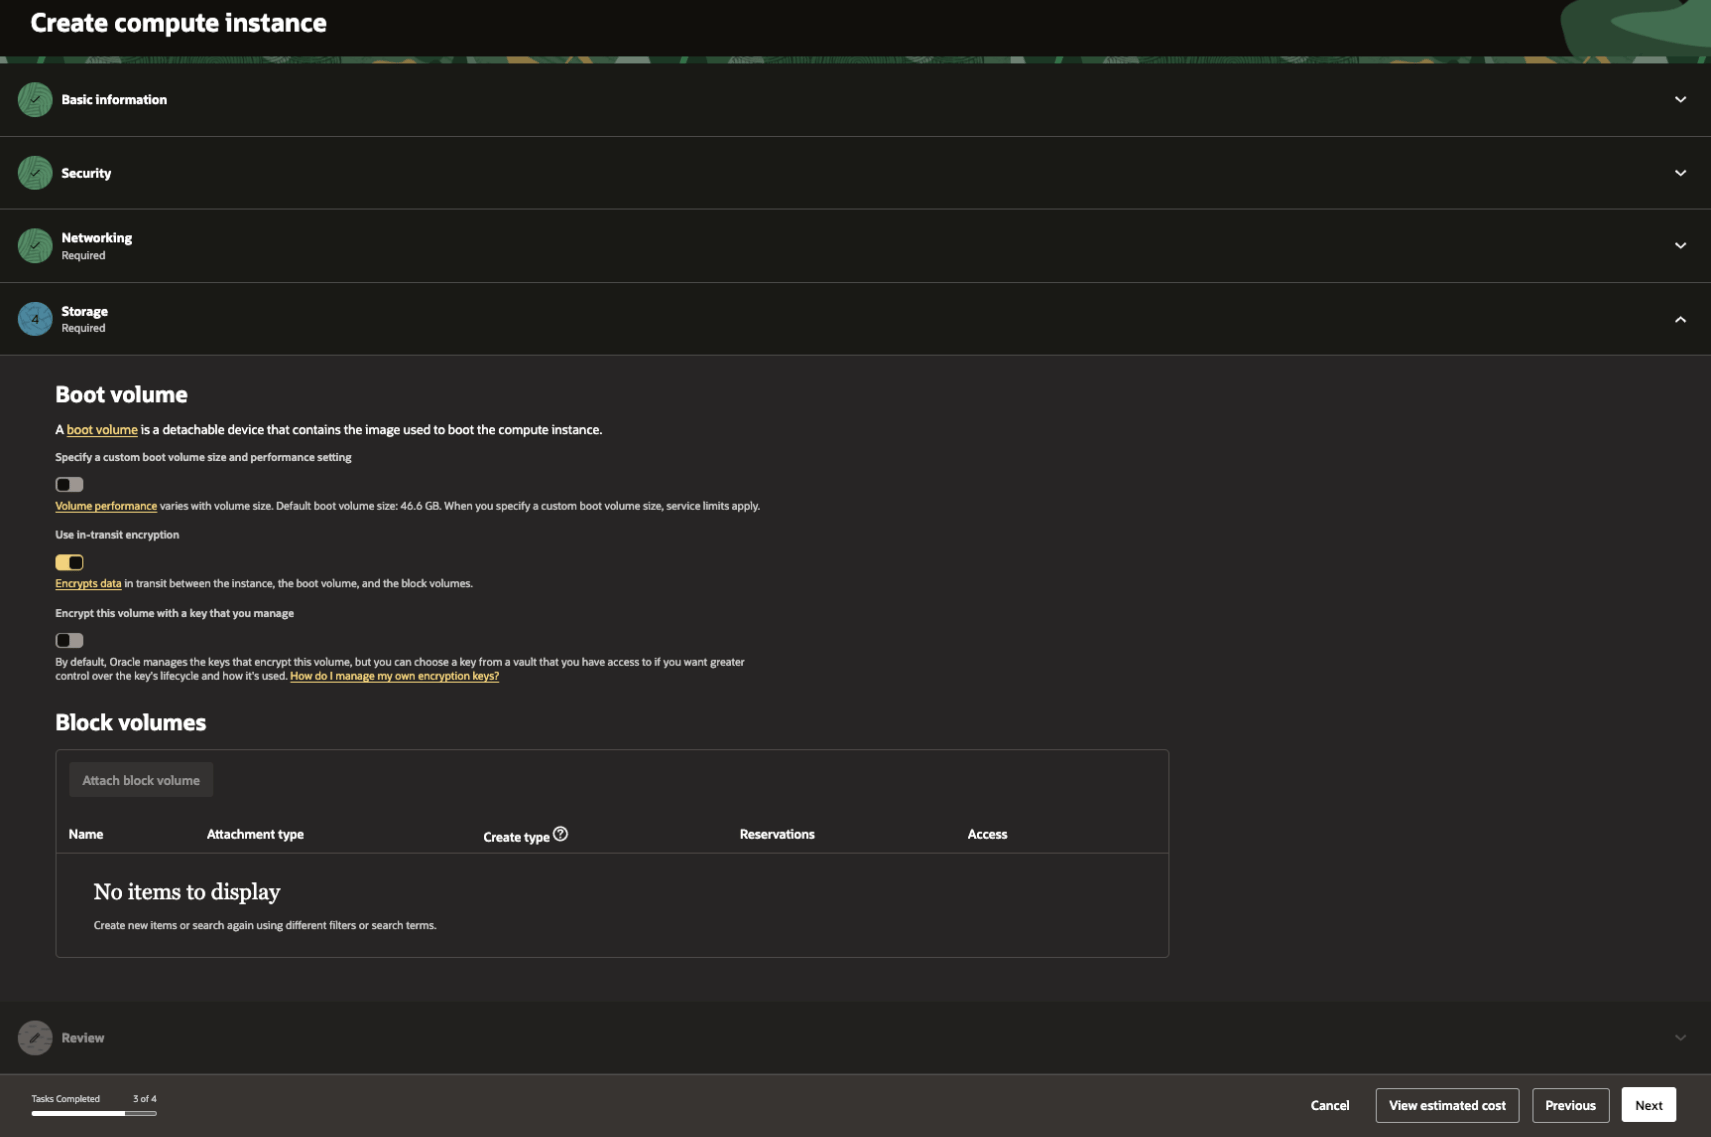
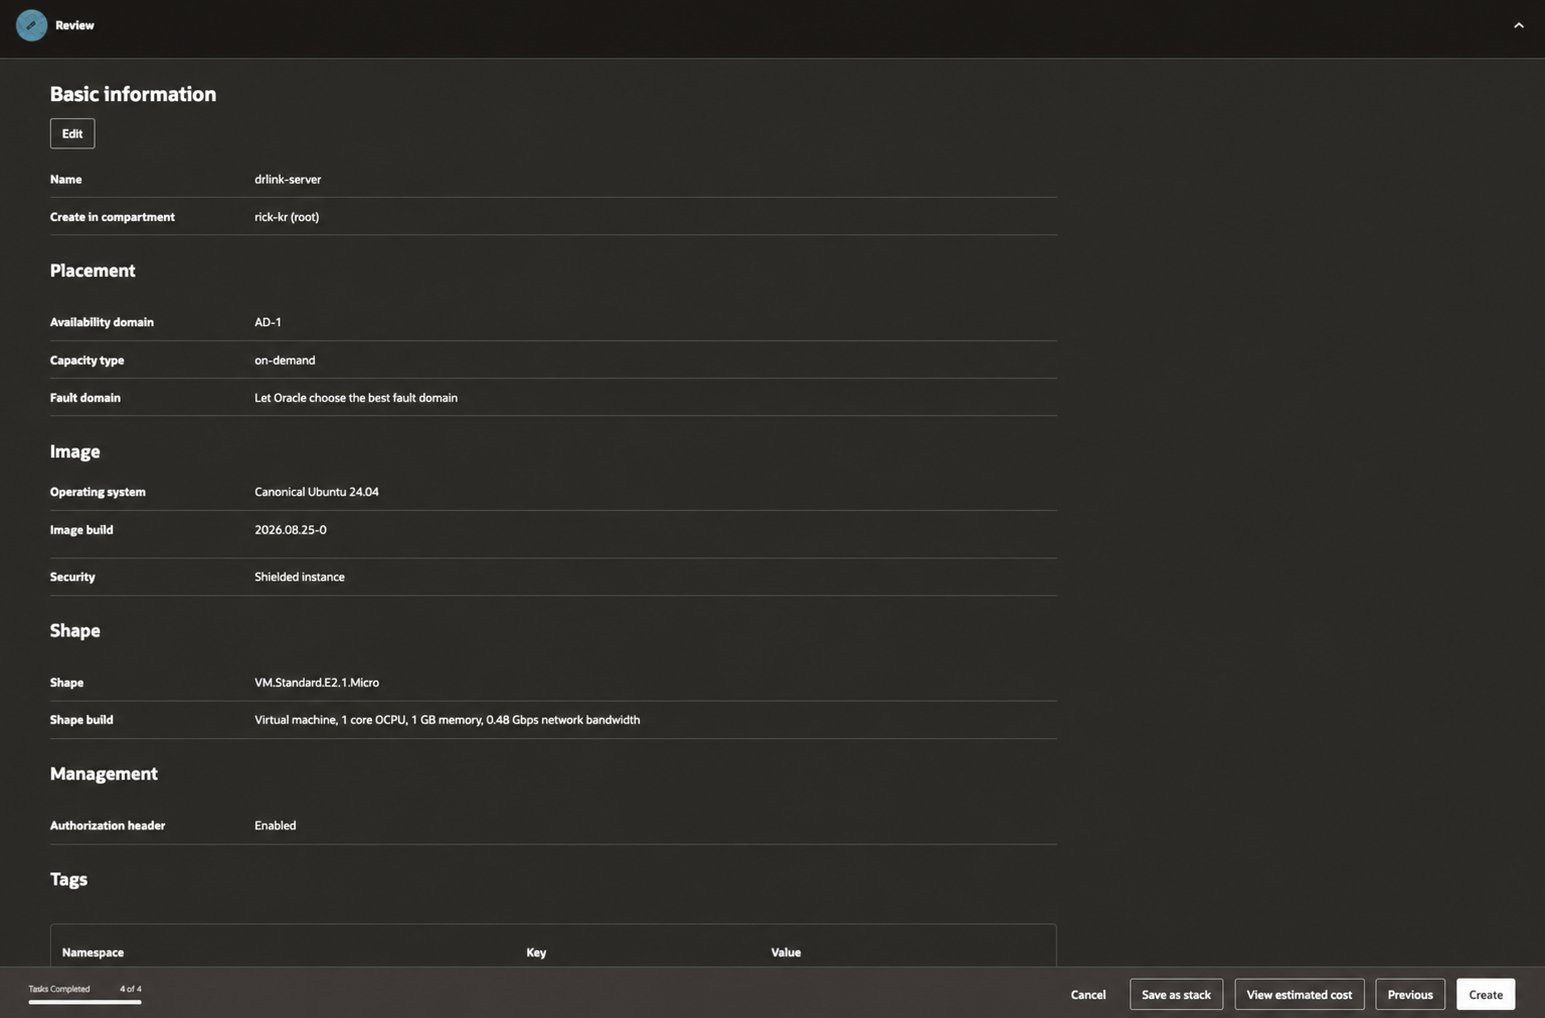
3-6. Review before creating the instance
Confirm that the image is Ubuntu 24.04 and that the shape, VCN/subnet, and SSH key match the intended configuration before creating the instance.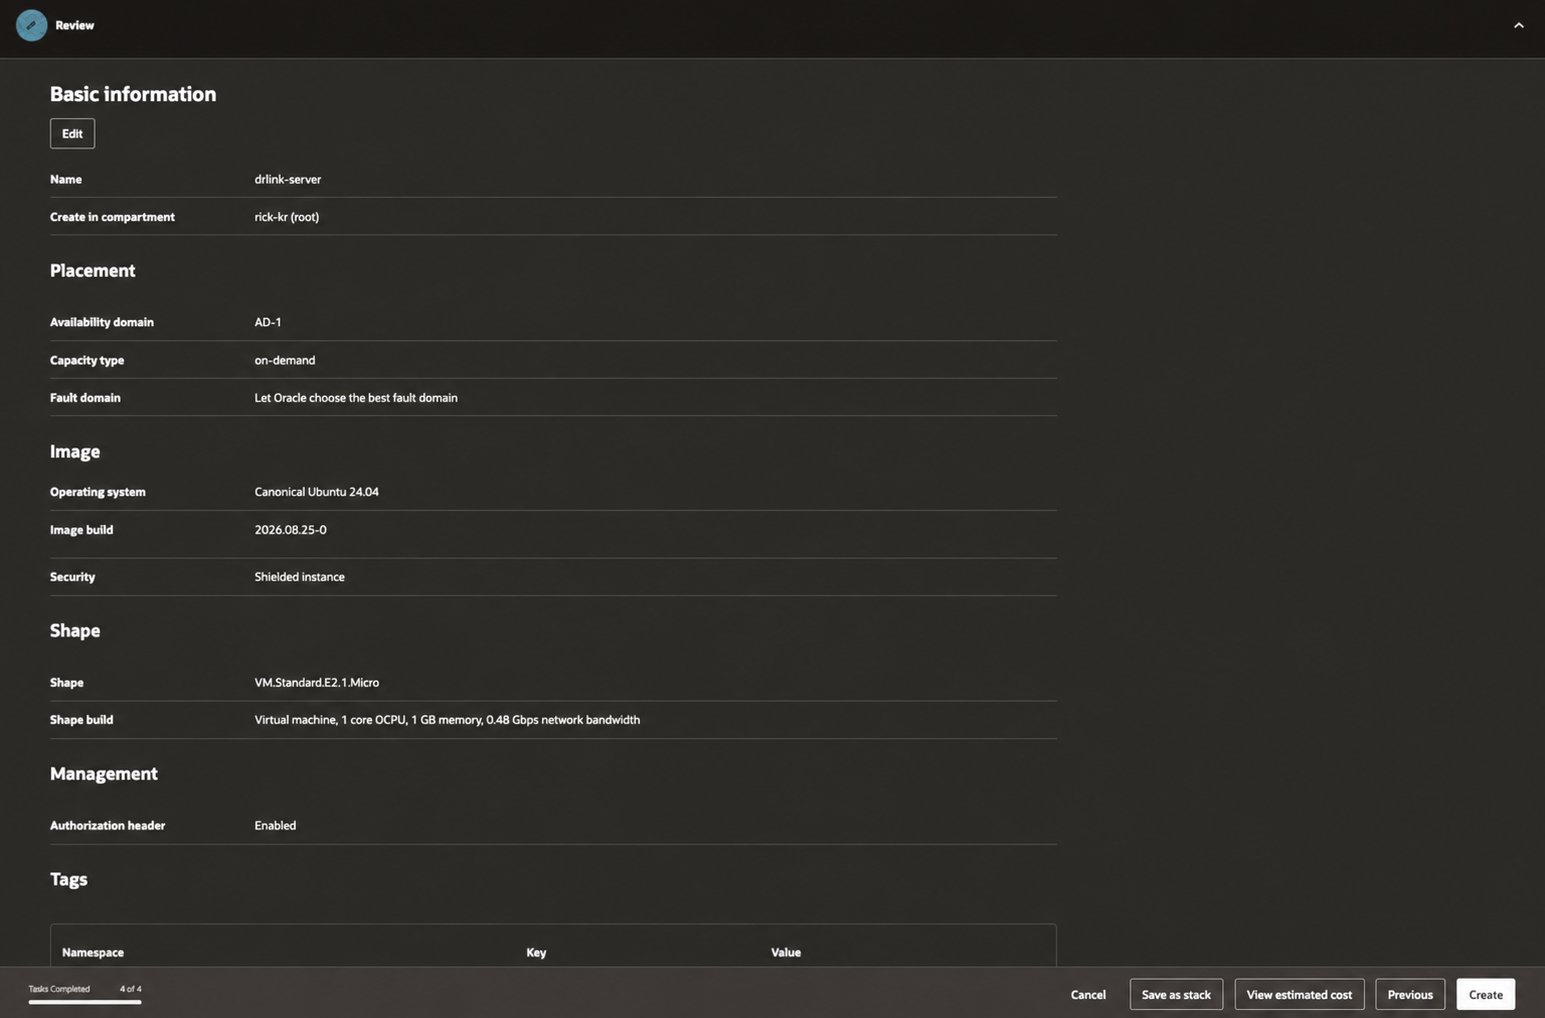
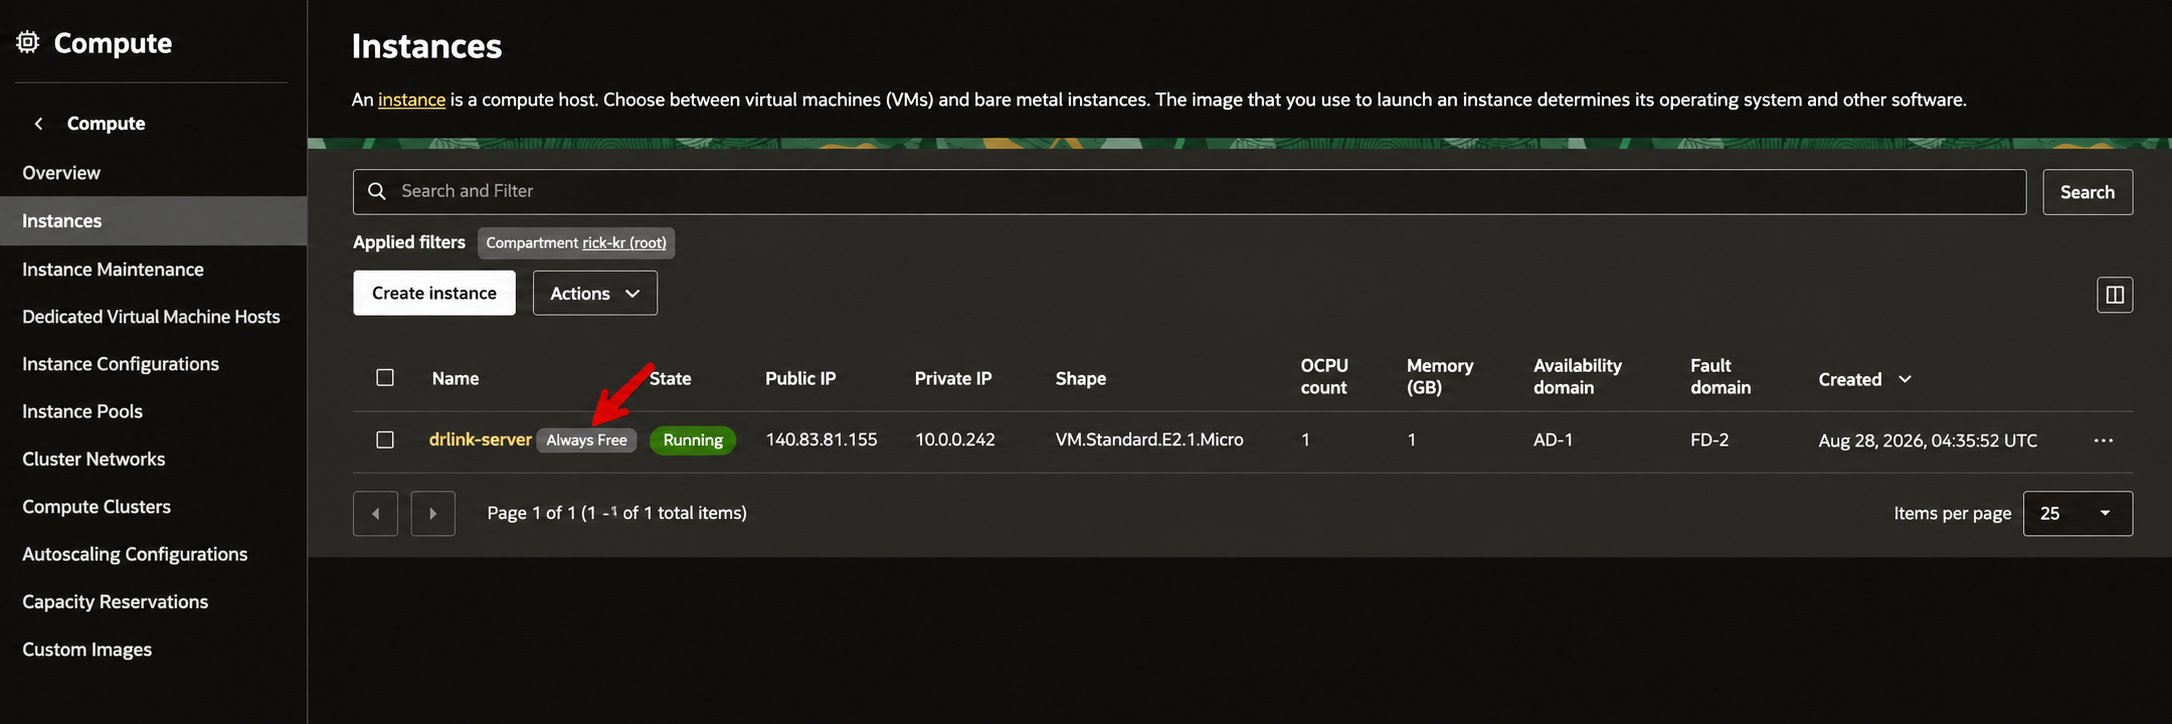
3-7. Confirm the created instance and Free/Eligible indicator
Confirm the instance state in the Compute Instances list.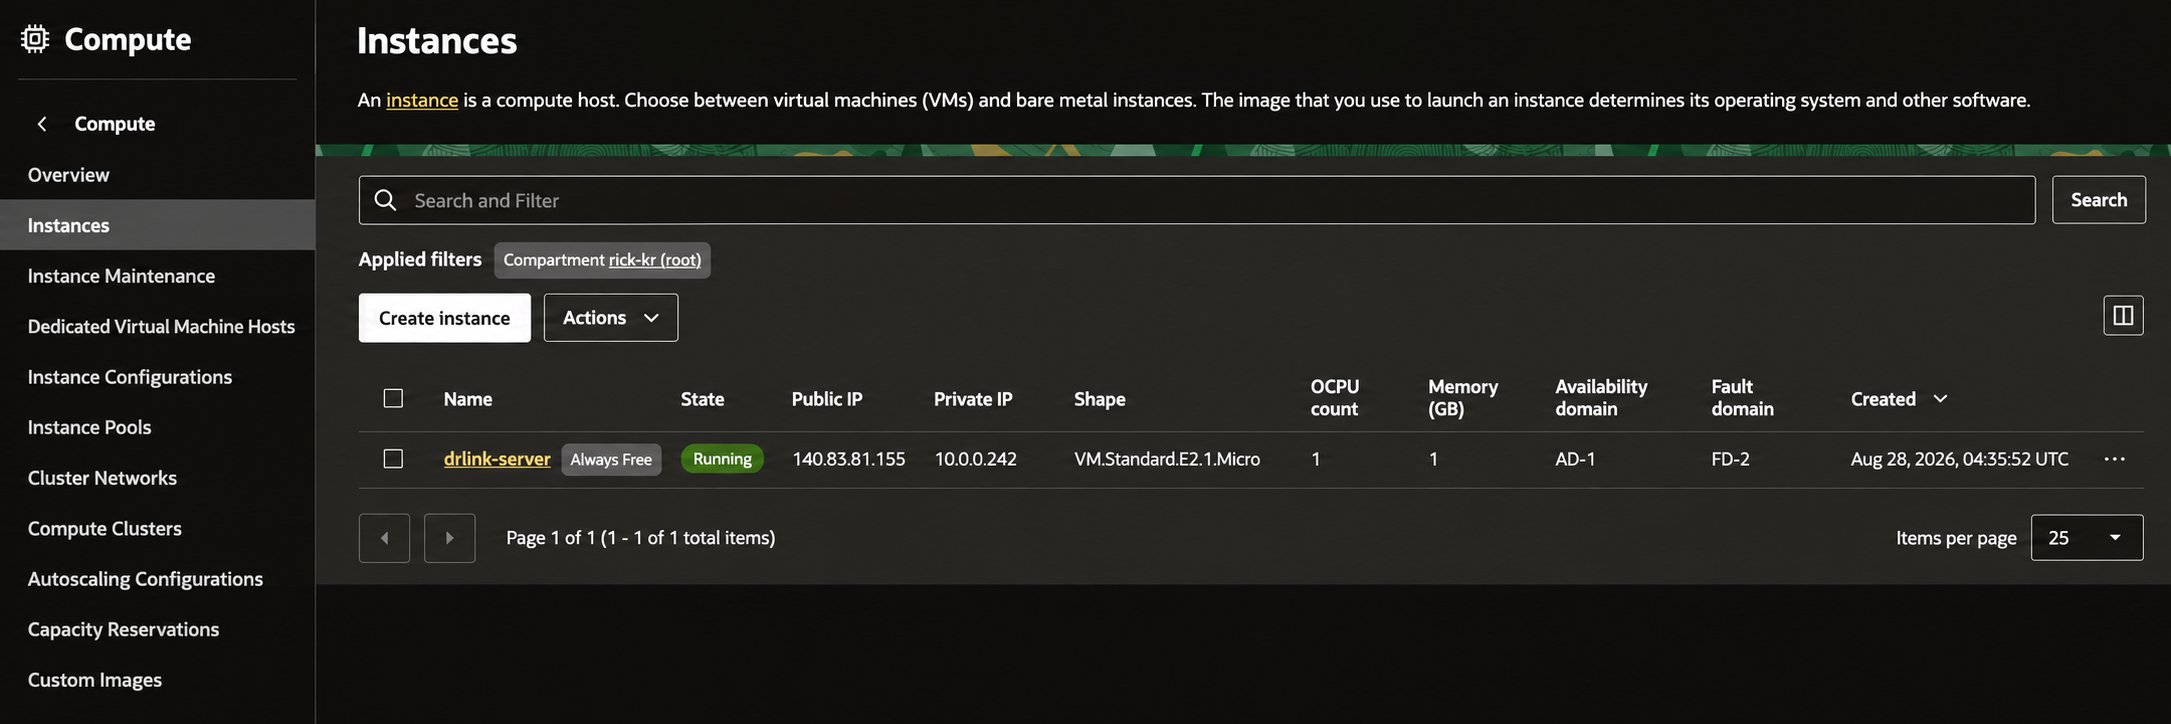
- choose the existing
data-relay-vcn - choose
data-relay-public-subnet - allow OCI to assign the private IPv4 automatically
- turn off Automatically assign public IPv4 address for the final persistent-IP design
- generate/download or upload an SSH public key
- if OCI generated the key pair, store the private key securely; do not assume it can be downloaded again later
- keep the boot volume simple unless you have another storage requirement
4. Attach a Reserved Public IPv4
From the instance details page, open Networking → Primary VNIC.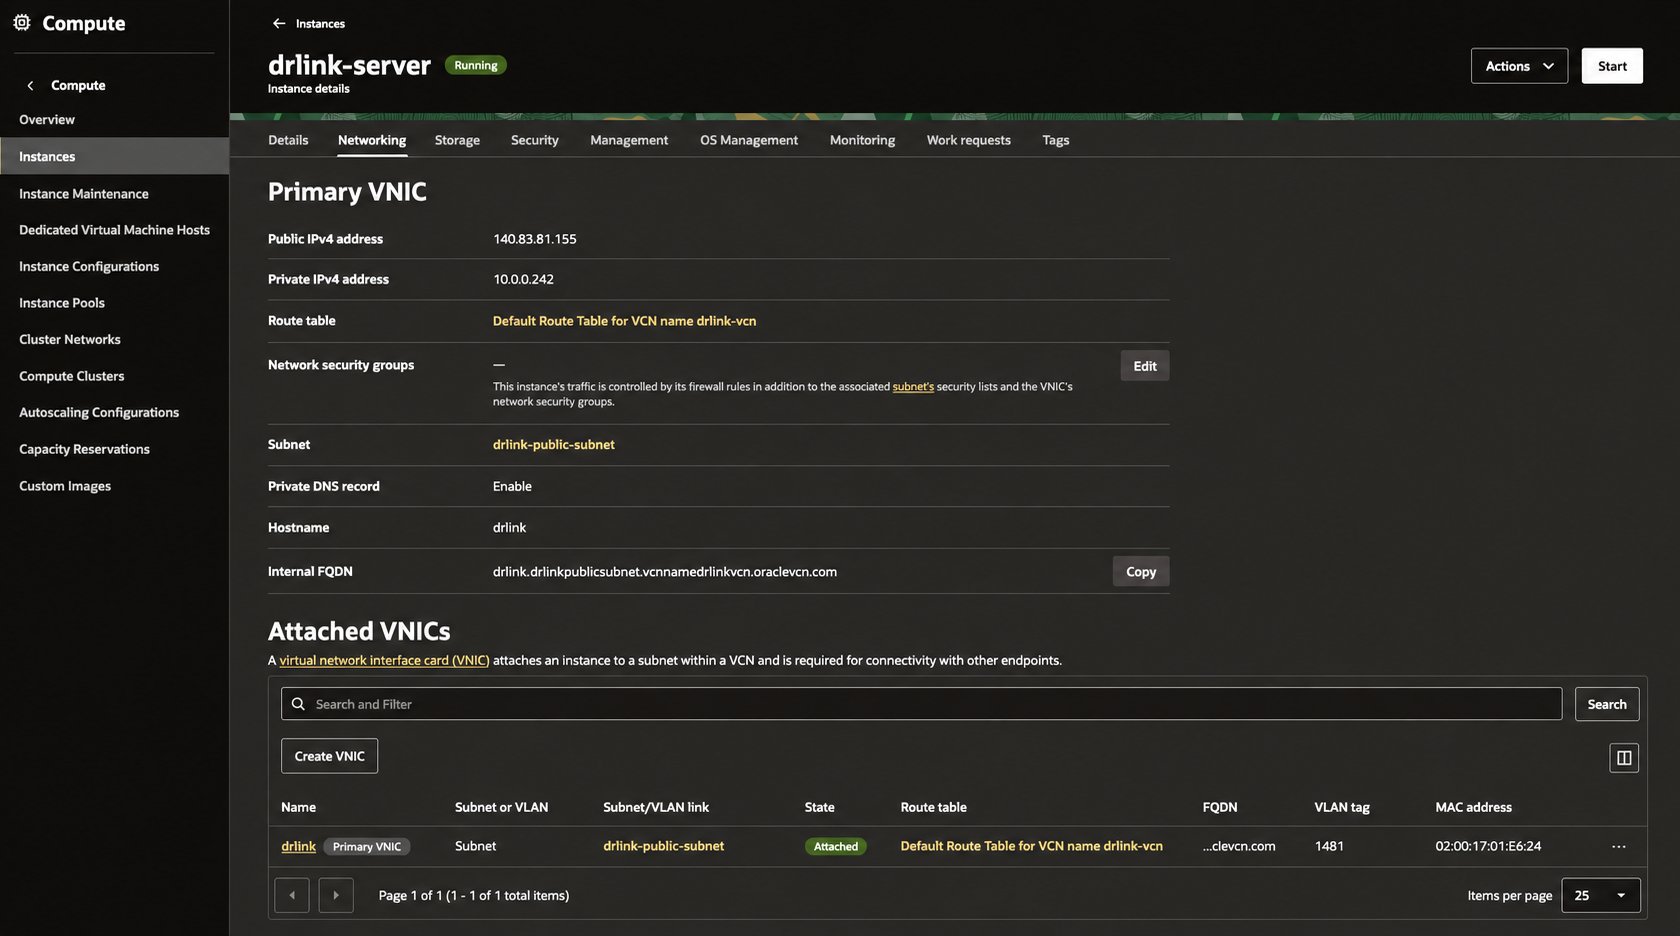
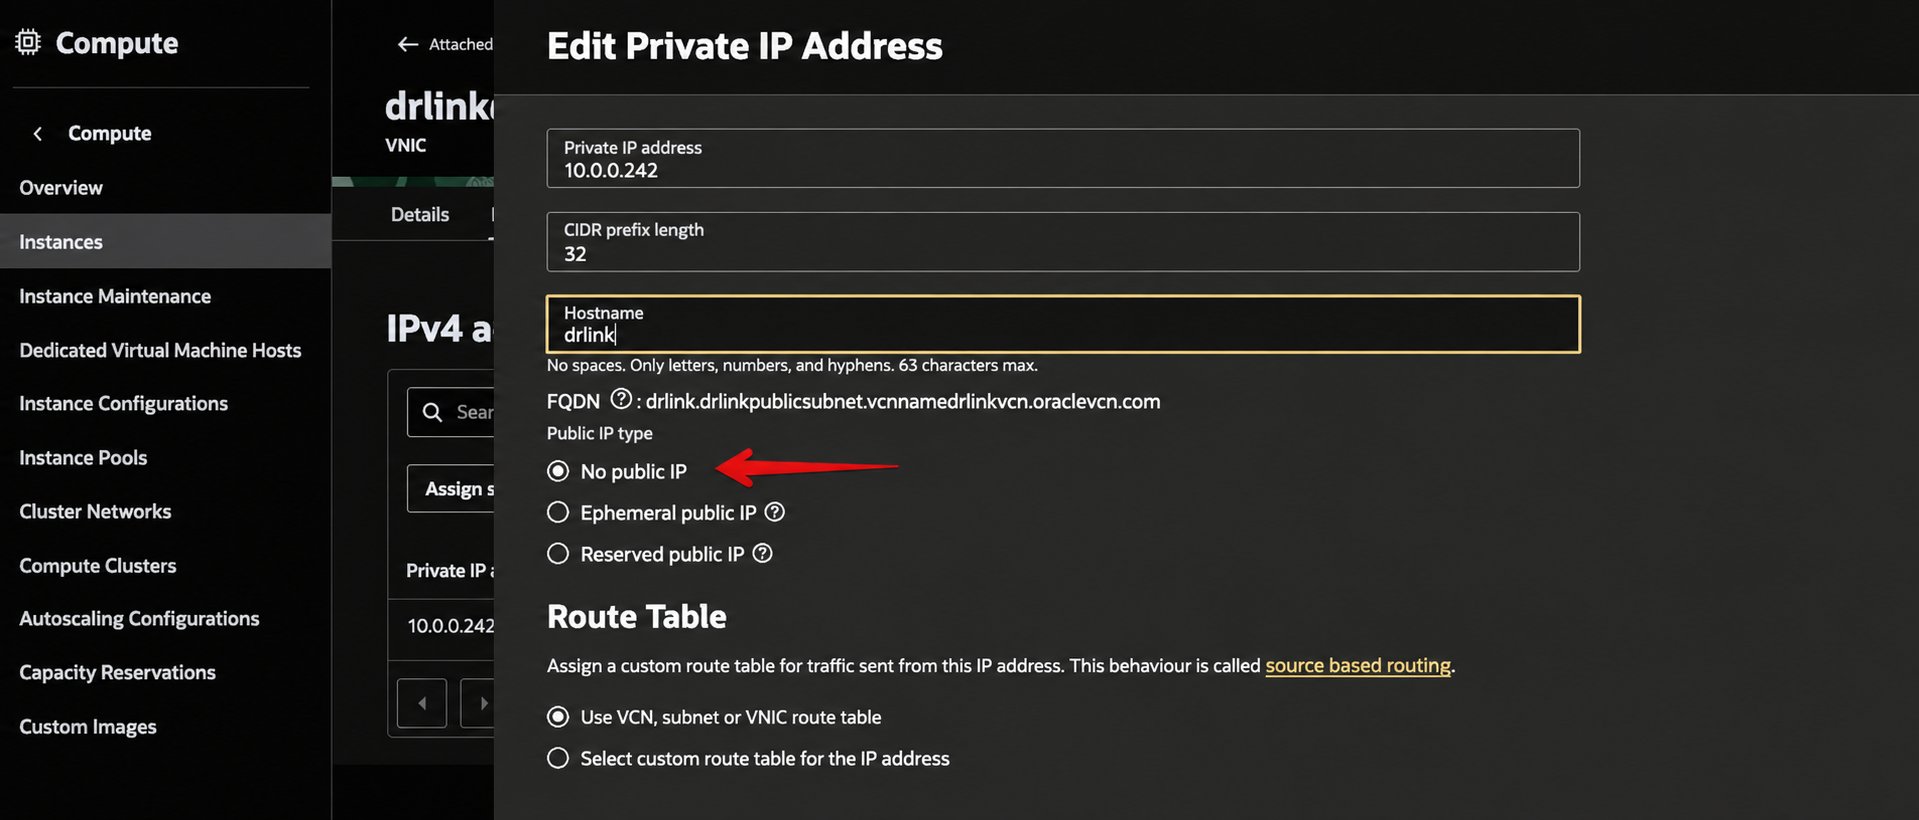
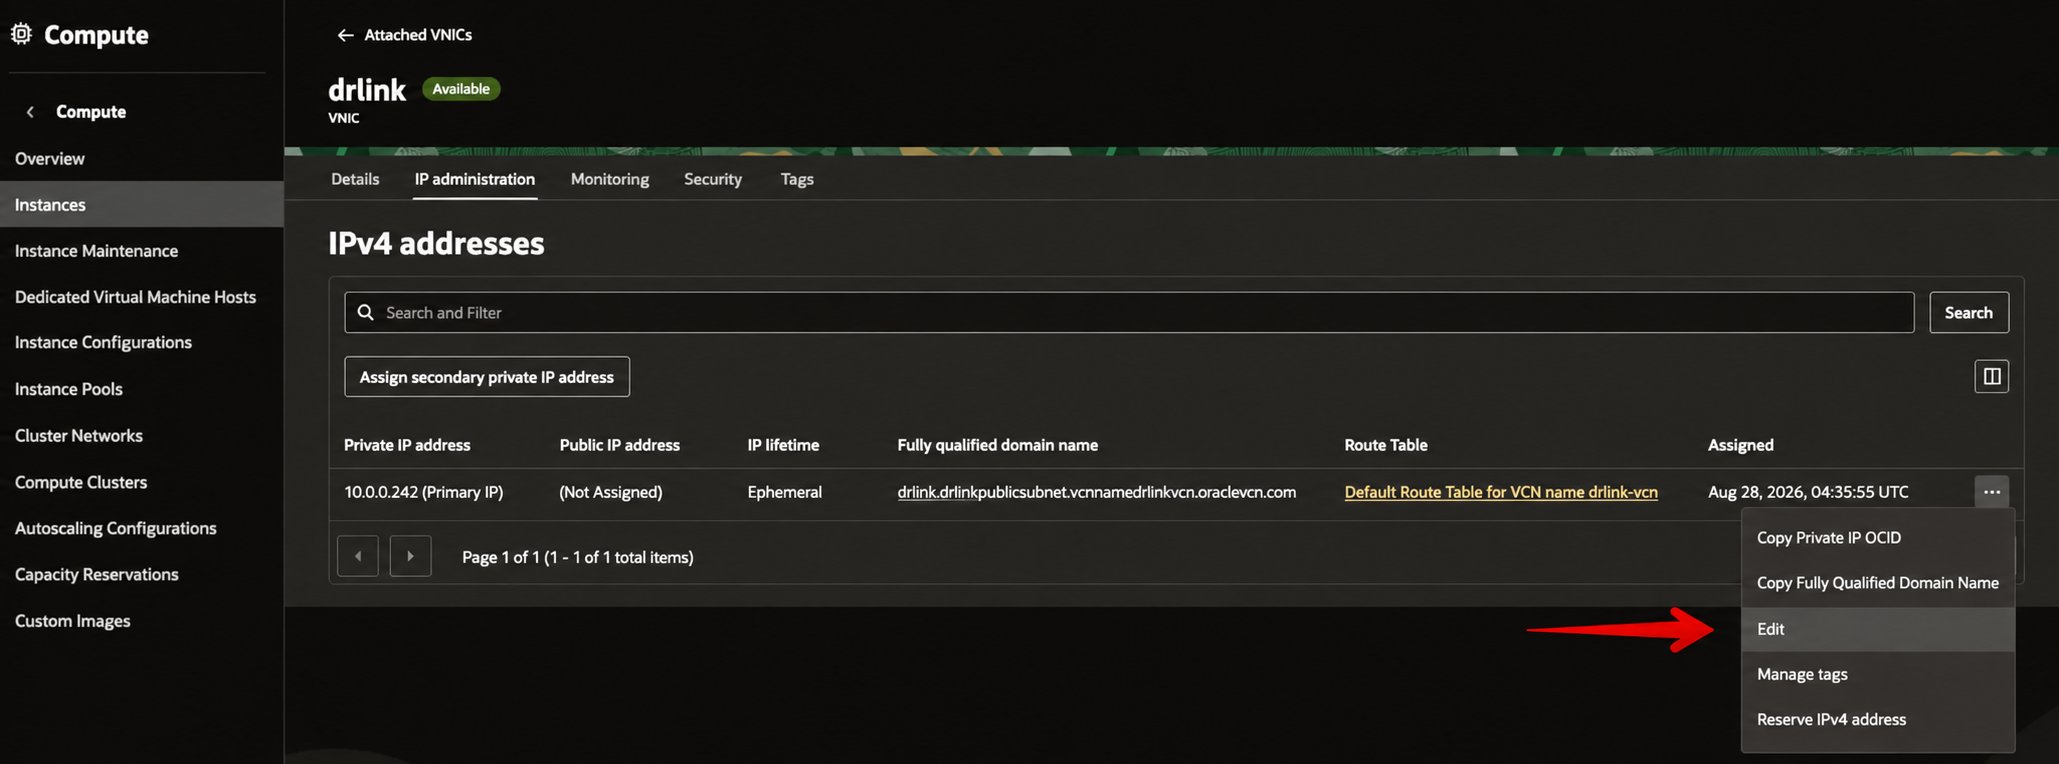
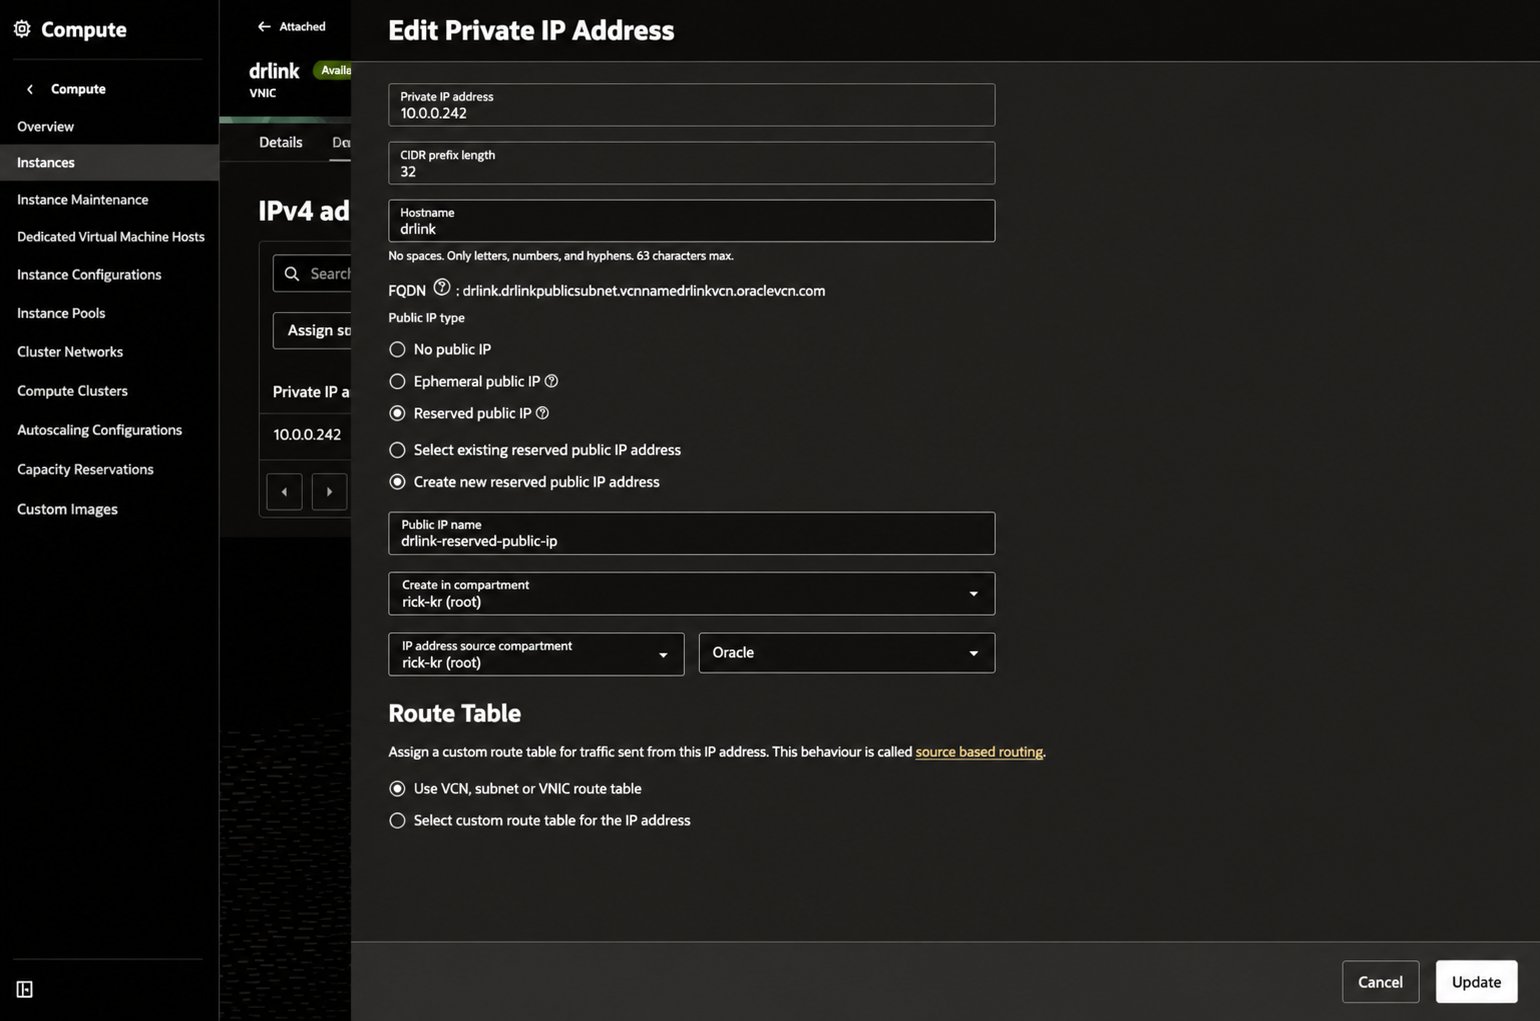
ip addr on the VM normally shows the private 10.x.x.x address rather than the public address.
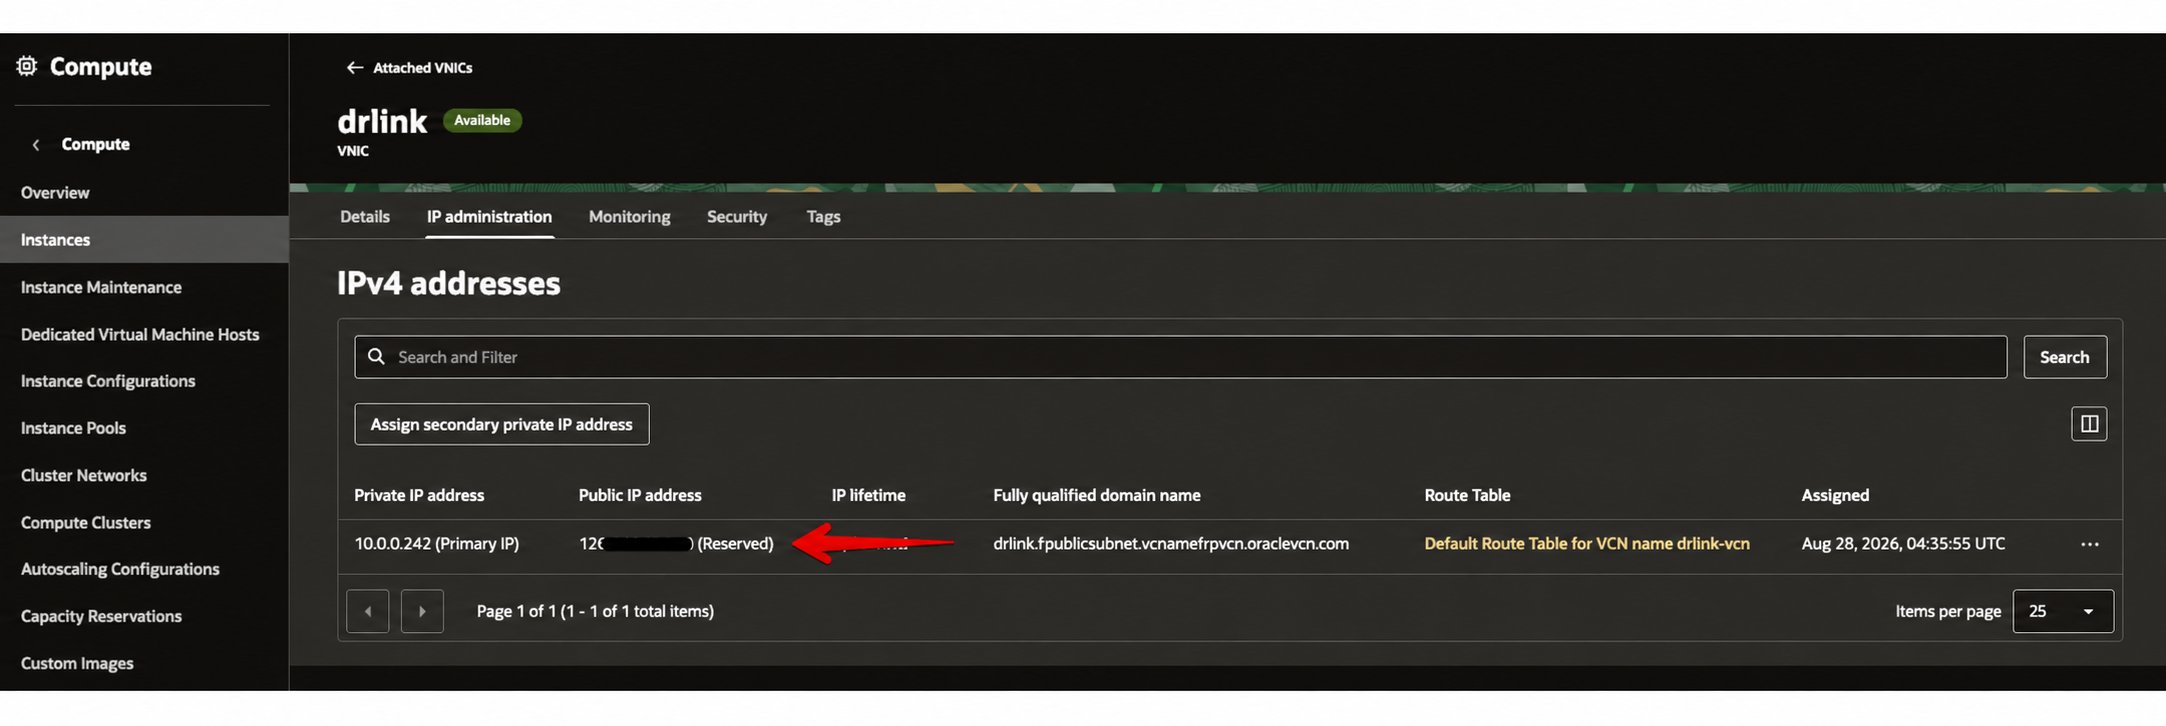
Confirm that the Reserved Public IP is attached to the Primary Private IP. The public IP value in this screenshot has been masked before publication.
Picture 32 (successful SSH session) from the original Word guide is still not published because it contains field connection details. The SSH procedure below uses the
<RESERVED-PUBLIC-IP> placeholder instead.5. Test SSH access
For OCI Ubuntu images the default account is normallyubuntu: